
PMR GARDENING
Welcome to the PMR Gardening Page!
A resource for beginner to experienced gardeners. I hope this page is helpful in discovering some new options that might make your organic vegetable and herb gardening experience easier.
Browse some of my best gardening tips, gardening resources, and favorite gardening products, tools, and accessories from Amazon below.
(Jump to each section by clicking on the categories below. To view details or purchase any of my recommended garden products directly on Amazon, just click on the product images.)
GETTING STARTED
Step 1 - MEASUREMENTS OF YOUR PLANTING AREA | Step 2 - FINDING YOUR PLANT HARDINESS ZONE | Step 3 - CHOOSING THE RIGHT PLANTS FOR YOUR GARDEN
Step 4 - PLANT PLACEMENT IN YOUR GARDEN BEDS: Selecting Companion Plants | Finalizing Your Planting Layout
Step 5 - COMPOSTING & AMENDING YOUR SOIL: Composting | My Favorite Composting Products | Amending & Fertilizing Your Soil
Step 6 - CONTROLLING GARDEN PESTS & ANIMALS: My Preferred Organic Pest Control Methods | Other Methods For Controlling Pests
MY FAVORITE GARDEN PRODUCTS & ACCESSORIES: Organizing Seeds & Plants | Harvest Baskets & Garden Carts | Protective Garden Gear & Accessories
MY GARDEN PHOTOS & UPDATES: Spring/Summer Garden 2026 | Spring/Summer Garden 2025
By no means do I consider myself an expert gardener, but after years of trial and error I’ve found all the methods and products listed on this page to work well for me. All garden conditions vary, but I hope this information is helpful in improving your garden and making your harvest a success.
GETTING STARTED
Before you begin planting your vegetable and herb garden, it’s important to plan out where everything will be planted. This process can be done for ground garden beds or raised garden beds.
STEP 1 - Determine the Measurements of Your Garden Planting Area
Hand Drawn Plan: You’ll need the exact measurements of your garden beds/planting area. To draw your garden by hand, use a pencil until your final planting is done. This allows you to easily make changes along the way without having to start from scratch.
Step 1a: Map out your garden area and notate the measurements for each section of your garden beds. This process works for both in-ground beds and raised garden beds.
Step 1b: Now create a planting grid. Within each garden bed section, draw square blocks which represent each 12 inch square foot area. Note the cardinal directions (i.e., North, South, East, West) on your plan. Click on the buttons below for examples of Step 1a & 1b.
Free Online Design Tool: If you don’t want to hand draw your plan, VegPlotter is a free online garden design tool that allows you to easily create a 2D garden design to draw out your garden. To simplify the drawing, I used the 2D tool (you can select meters or feet). To help you get started, I created a quick guide to get you through Step 1 of your plot plan. Just click on the “STEP 1” button below for an example of an online plot plan. For instructions on how to get started, click on the “Step By Step Quick Guide” below to design this basic plan with VegPlotter. You can print out your plan and draw in which plants will go where, or you can design your full garden online in this program.
STEP 2 - Finding your Plant Hardiness Zone
Finding Your Zone in the USA: It’s important to know what zone you are in before you choose your plants. This will also help you determine timing for planting certain seedlings or seeds.
The USDA Plant Hardiness Zone Map is a wonderful resource to find your exact zone by zip code within the United States. Just type in your zip code, select your city from the drop down menu, and it will zero in on your exact location and zone.
The photo below is a general snapshot of the zones in the USA.
Finding Your Zone Internationally: For countries outside the United States, there are online platforms that provide independent equivalent hardiness zone maps for Europe, Canada, Australia, China, and South America.
Plantmaps.com is a good resource for finding the plant hardiness zones in your specific country. Just scroll down on the main page to the sections: “Hardiness Zone Maps for Canada Provinces” or “International Hardiness Zone Maps,” and select your country to view the zones map.
The photo below is a general snapshot of the zones in France. You can find similar maps for your country on Plantmaps.com, as well as zero in on your zip code.
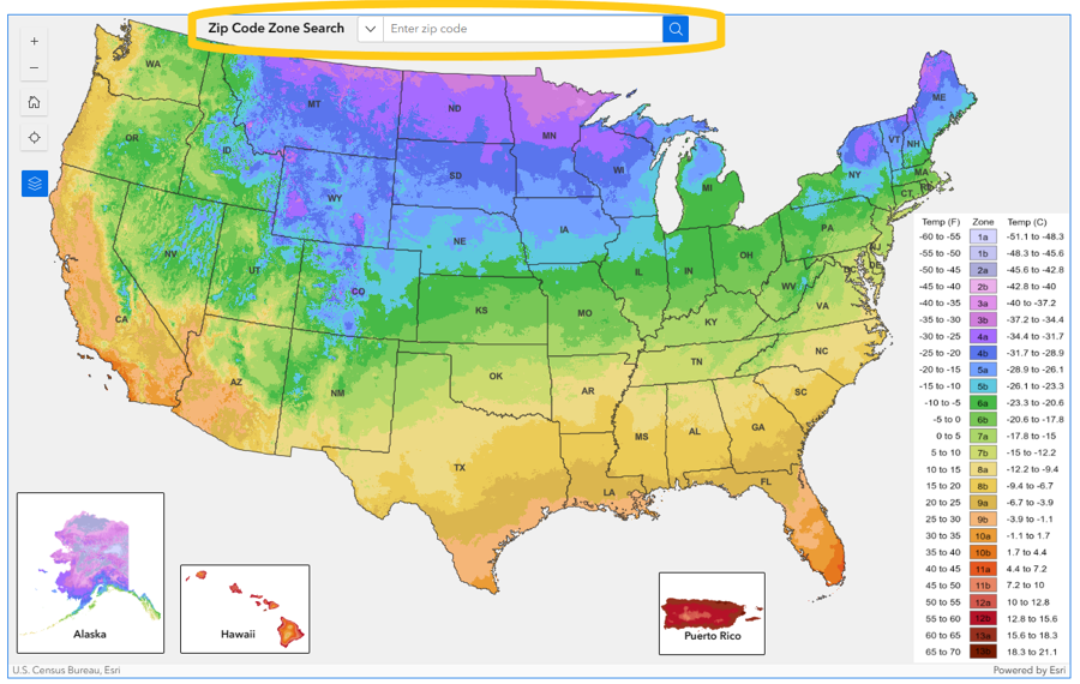
USA Planting Hardiness Zone Map
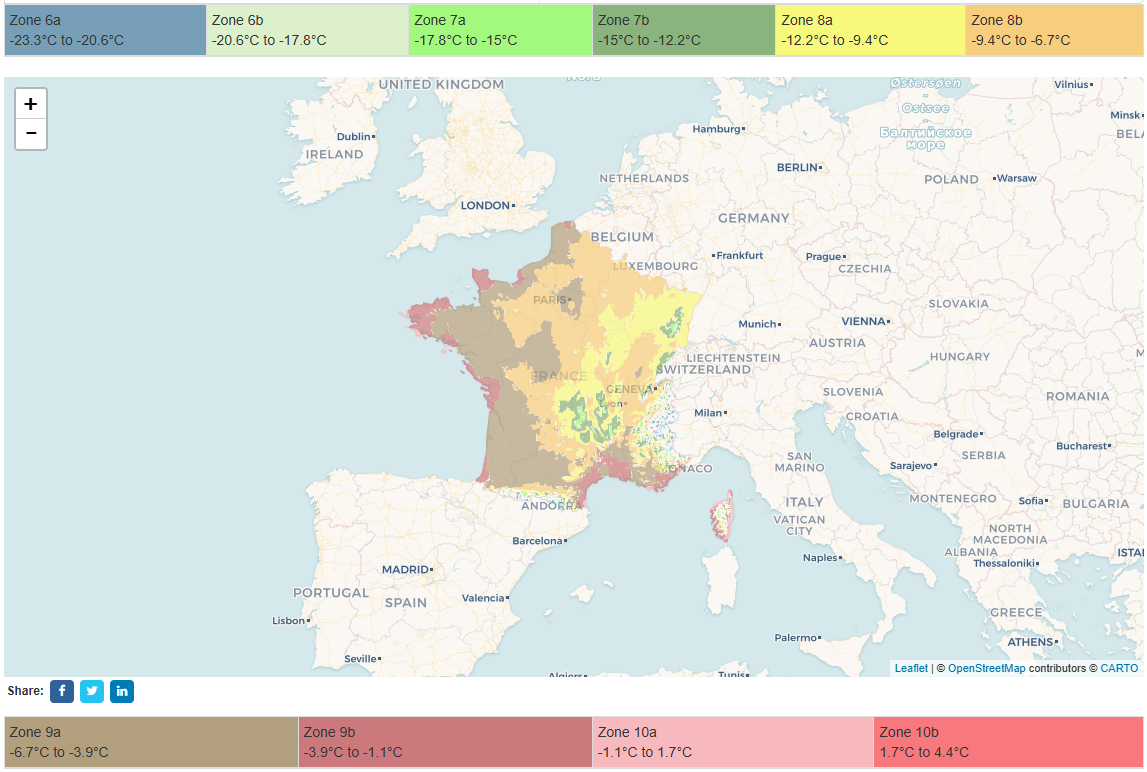
France Planting Hardiness Zone Map
STEP 3 - Choosing the Right Plants for Your Garden for Each Season of the Year
Choosing the Right Plants for Your Garden for Each Season of the Year: First and foremost, start a list of all the vegetables and herbs you and your family enjoy eating. There is no point in planting something you don’t want to consume. Once you’ve completed your plant wish list, check your local hardiness zone and frost dates, then match the plants to each area of your garden bed(s)’ sunlight and soil.
USA: Using a resource like the Old Farmer’s Almanac Planting Calendar, is a great way to determine when to plant your seeds. Type in your zip code and select your city. This website will a specific Planting Calendar & Schedule for your specific city for both Fall and Spring planting.
When to Plant: The schedule will provide the type of crop, and for each crop; when to start seeds indoors, when to transplant seedlings outdoors, when to direct sow the seeds, and the last planting date.
Consider Frost Dates: You want your seedlings/plants to have time to mature before the first frost in the fall. If you are spring planting, you most often need to plant after the last frost. Once you’ve entered in your zip code and reviewed the planting calendar on the Old Farmer’s Almanac Planting Calendar for your specific city, scroll down to select the link to your specific “Frost Dates Calculator.”
This page will also provide links to a “Planting Zone Guide,” “Flower Planting Calendar and Guide,” and for those who follow traditional planting by the moon, there is the “Gardening by the Moon Guide.”
INTERNATIONAL: A good resource for this information is to locate the National Horticultural Societies in your country. Check major domestic authorities like the Royal Horticultural Society (RHS) in the UK or state equivalents in Australia, Canada, and Europe for hyper-local monthly advice.
Global Crop Databases: Tools like the FAO Crop Calendar is an easy way to look up specific agroecological planting seasons, and select by country and by crop.
STEP 4 - Plant Placement in Your Garden Beds
Selecting the right location for each plant in your garden can be a challenge. There are many plants that help each other thrive, and others that steal nutrients and water. Some plants even secrete damaging chemicals to companion plants. Once you decide what vegetables and herbs you want to grow, the most important step is deciding what plants go where in your garden.
SELECTING COMPANION PLANTS
Companion Plants: Some plants grow well next to one another and others inhibit the growth of their neighboring plants. To determine the right companion plants for your garden, I find doing a search in Google for each plant is useful. The following search phrases worked well for me. Just swap out the main plant for each search.
“Should tomatoes and peppers be planted next to each other?”
“Should tomatoes and peppers be planted next to each other?”
Companion Planting Guide: The Old Farmer’s Almanac Companion Planting Guide is located on this page link. Just scroll down to view a list of various crops, their companion plants, and their benefits. This includes a list of the best companion vegetable plants, herbs, and flowers.
For example, BEETS grown well next to these companion plants: Bush BEANS, GARLIC, LETTUCE, and ONIONS. Bush beans fix nitrogen in the soil and improve fertility. Garlic improves beet growth and flavor. Lettuce complements root depth and helps suppress weeds. Onions reduce pests and improve yields.
Companion Herbs & Flowers: Bright flowers like MARIGOLDS and ZINNIAS, and strong smelling herbs and vegetables like BASIL or GARLIC deter certain pests and attract helpful pollinators.
Balance Nutrients: Vegetables like CABBAGE are heavy feeders. Pairing them with nitrogen-fixing plants like BEANS or PEAS help keep the soil naturally rich.
Matching the Right Heights: The height of each plant and where it is planted is an important part of planning your garden. Tall plants like CORN are best planted alongside shorter, climbing plants like POLE BEANS, WINTER SQUASH, and PUMPKINS. This creates a garden that makes the best use of the sunlight.
Avoiding Specific Plant Combinations: It takes a little time to set up your garden initially, but it’s important to know which plants will help others thrive, and which plants to avoid planting next to one another.
Same Family: Do not plant members of the same family together. For example, TOMATOES and POTATOES are from the same family, which means they can catch attract the same pests and catch the same diseases.
Chemical Rivals: As an example, FENNEL is allelopathic, which means its roots, leaves, and seeds secrete natural chemical compounds (like anethole) into the dirt. This chemical can stunt the growth, weaken, or kill neighboring plants.
Root Competition: Planting alliums (the onion family) next to beans or peas, can slow down or stop the growth of legumes.
Mixing Root Depths: Deep rooted vegetables like CARROTS should be planted next to shallow-rooted crops like lettuce. This way they don’t feed at the exact same layer of the soil, allowing them to draw the most nutrients.
FINALIZING YOUR PLANTING LAYOUT
Drawing Your Garden Planting Layout: As noted in Step 1, you’ve already sectioned off your garden beds into 12 inch squares. Now that you have figured out what plants grow well next to one another, it’s time to decide your garden bed plan. Using a pencil, write in the names of each plant in the squares. Click on the button link below to view a very rough example of a drawing for my spring garden.
Some plants need more or less planting room for each seed or seedling. In my drawing, you can see that some plants like ZUCCHINI SQUASH, required 6 square feet of space in the larger garden bed for one seed/seedling. Others like the HEIRLOOM TOMATOES, require only 1 square foot of space for one seed/seedling. Other examples are the RADISHES, IMPERATOR CARROTS, LEEKS, and SCALLIONS, which you can plant 16 seeds/seedlings per one square foot of garden space.
Although I did not indicate the flowers in my drawing, I did plant them but only after I had finished planting my vegetable and herb garden. I added complementary flowers like MARIGOLDS and ZINNIAS in order to attract pollinators.
STEP 5 - COMPOSTING & AMENDING YOUR SOIL
Composting is an organic way to amend (enrich) your soil. This is an important step that should be done before planting any seeds or seedlings in your vegetable and herb garden. My recommended Amazon products for composting are listed in the photo links below.
COMPOSTING
Compost Bins: Instead of starting a compost pile in your yard, where critters, flies, and bugs will enjoy feasting on your decomposing kitchen scraps — try an outdoor compost bin. I found the dual rotating compost bin to work well by keeping out the odors and preventing unwanted animals or bugs from getting into your compost. You will need the following items to get started:
Indoor/Kitchen Compost Bucket: This surprisingly keeps the odors from smelling up your kitchen. Just place all plant based scraps into the bucket, and empty it once or twice per week into the larger outdoor compost bin.
What type of things/scraps can be composted? During the fall, add plenty of crushed fallen leaves and broken small twigs to your compost bin. Year round, dump your vegetable and fruit scraps into the bin. Make sure to chop them into smaller pieces. Egg shells, coffee grounds, banana peels, avocado peels, carrot shavings, ends and skins of garlic and onions, peels and stems of virtually any fruit and vegetable (such as celery, turnips, beets, cucumbers, peppers, leafy greens, apples, peaches, etc.) all breakdown well and are a nutritious way to amend your soil. You can compost most greens and remnants of fruits and vegetables. Just remember to only put plant-based scraps into your compost bin.
What should I avoid composting? Do not place any fruit or vegetable seeds in your compost bin, as they might sprout when you add the compost to your garden soil. Also, citrus peels will make your compost and soil too acidic. A few citrus peels are fine, but generally I recommend finding another way to dispose of citrus fruit. Do NOT place any animal, oil, or fat based products in your compost bin (scraps or leftovers such as, cheese,, milk, oils, butter, leftover fish or meat, etc.). Everything must be plant-based. Although eggs are from an animal, egg shells are safe to compost and are a wonderful addition to your compost pile.
Outdoor Rotating Compost Bin: Empty your kitchen compost bucket into the outdoor bin, and rotate it once or twice per week. The best place to put one of these outdoor bins is in full sun. If you don’t have a place that gets full sun, it works fine in partial sun — it just takes a little longer to breakdown the scraps into usable compost.
Dual versus single rotating compost bins: If you have the room in your backyard, I find dual compost bins to be more useful. For example, use only one side of the bin until it’s full, then start filling up the other one. Over time, after rotating once or twice per week, the first side that you filled up will be ready to use. It can be emptied and placed in your garden to amend your soil, leaving that bin empty and ready to start filling once your other bin is full. By using this method, you will always have compost that is ready to use.
How long does it take to make usable compost? Depending on your climate, location, and the amount of sunlight your compost bin gets everyday,
Ideal conditions could take between 4 to 8 weeks.
Depending on weather, sunlight, and location of your bin, it could take between 4 weeks to 3 months to create usable compost.
Can you speed up the compost process? Yes! Using an organic compost starter really helps to start breaking down the scraps.
MY FAVORITE COMPOSTING PRODUCTS
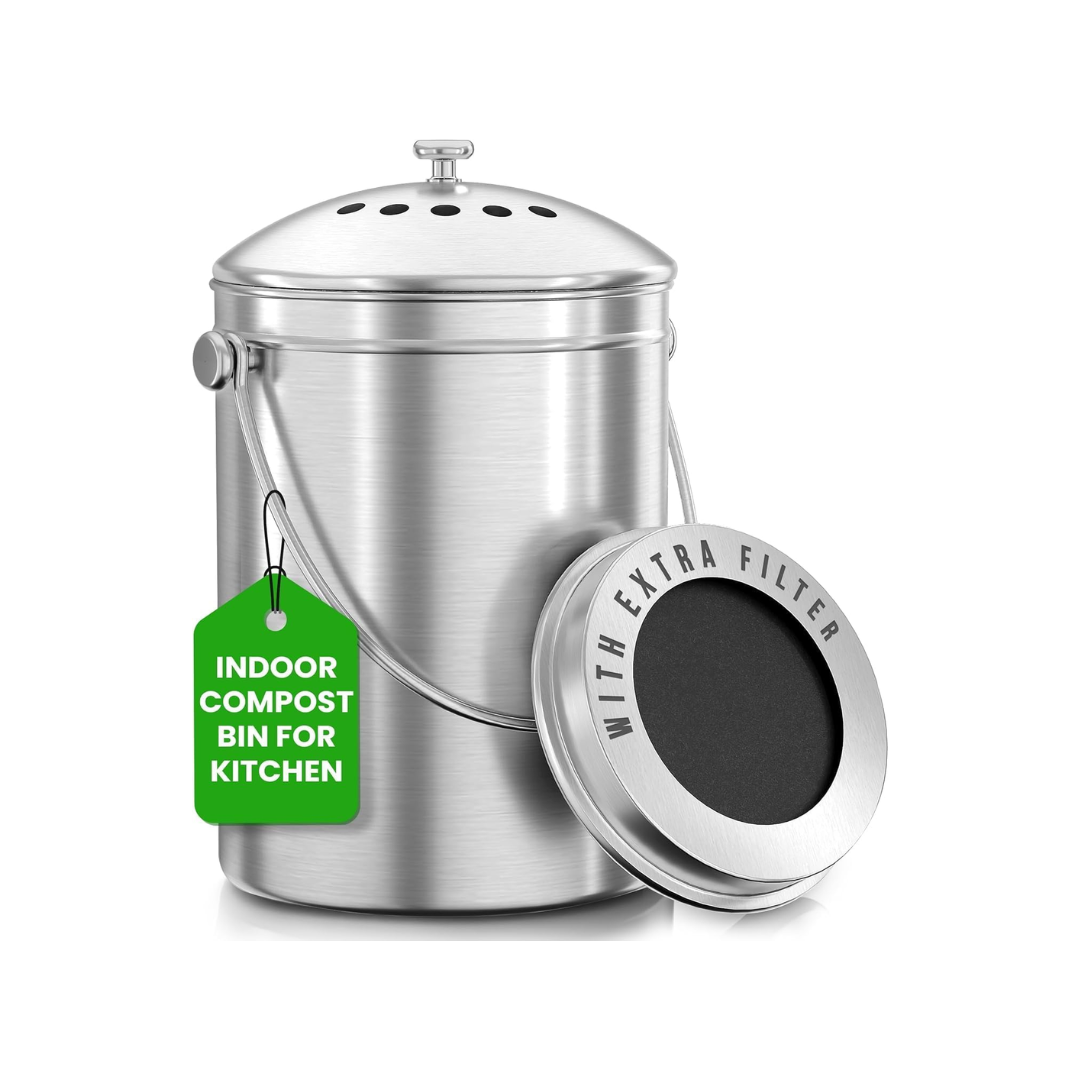
Utopia Kitchen Stainless Steel Countertop Compost Bin - 1.3 Gallon
Odorless kitchen countertop compost bin with charcoal filter. Ideal for food scraps and organic waste.
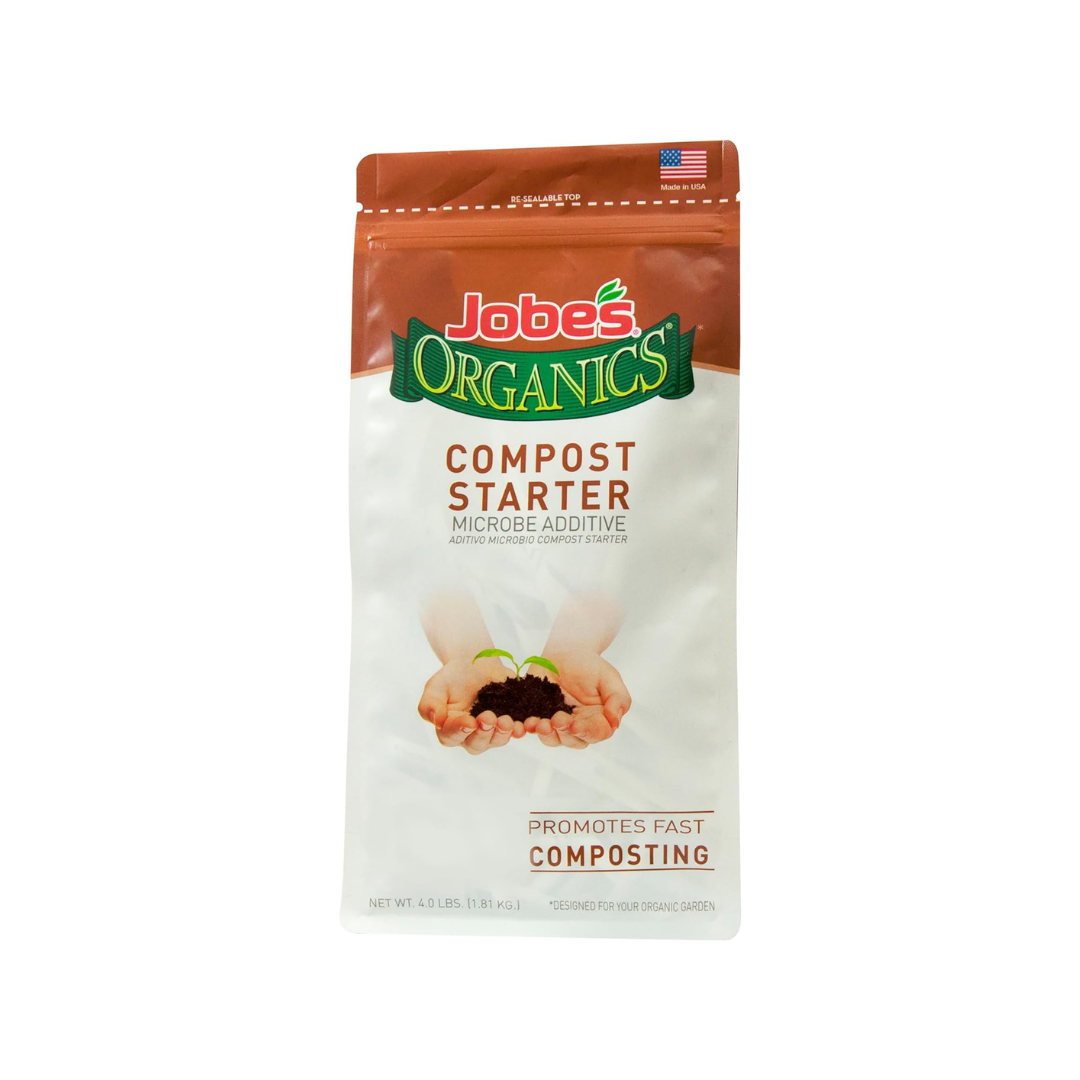
Jobe's Organics Fast Acting Compost Starter - 4 Pound Bag
Kick start your compost with this organic, fast acting granular fertilizer compost accelerator.

VIVOSUN Outdoor Dual Rotating Compost Bin - 43 Gallon
Heavy duty, easy to rotate barrel with two ample compartments. Includes screw driver and gloves for assembly.
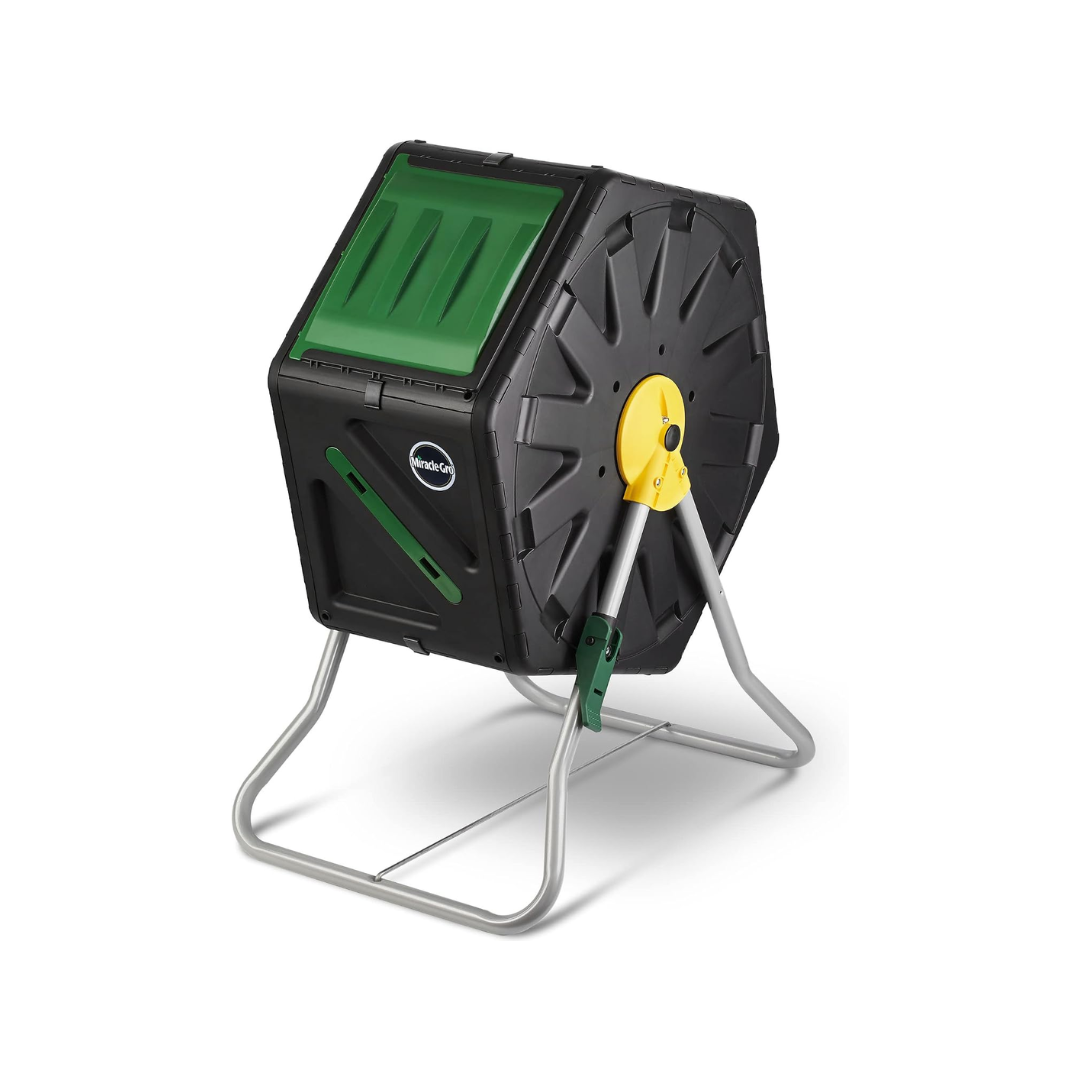
Miracle-Gro Outdoor Single Chamber Compost Bin - 18.5 Gallon
More compact heavy duty, easy-turn composter tumbler with 1 sliding door. 70 Liter barrel.
AMENDING & FERTILIZING YOUR SOIL
What does amending your soil mean? Amending your soil simply means to mix organic and inorganic materials into the ground soil (or the soil in your raised garden beds). When you amend the soil, it creates a more nutrient rich soil for your plants to grow and thrive. It improves its texture, moisture retention, and even its drainage.
My favorite way is organic composting (as noted in the “Composting” section above). This way you know exactly what goes into your soil. If you eat a varied diet of plant-based fruits and vegetables, you will likely end up with a very rich compost that will boost the growth and health of your plants.
If you do not want to make your own compost, buying an organic compost works just fine. It’s more expensive over time, but it does the trick. Below are some of my recommendations for store-bought organic compost and soil.
COMPOST
Compost for In-Ground or Raised Garden Beds: Back to the Roots Organic Compost Soil Amendment (manure-free)
Compost for In-Ground or Raised Garden Beds:Back to the Roots Premium Blend Organic Mushroom Compost (manure-free)
AMENDED SOIL
Soil for Raised Garden Beds: Nearsource Organics All Natural Organic Raised Bed & Container Mix Garden Soil (peat-free)
Soil for In-Ground Garden Beds for Drier Climates: Nearsource Organics All Natural Organic In-Ground Garden Soil (peat-free)
Soil for In-Ground Garden Beds: Amend Organic Garden Soil for Flowers and Vegetables
Soil for In-Ground Garden Beds: Back to the Roots Premium Blend Organic Soil
How often should you amend and/or fertilize your plants? Once your plants have sprouted and flowering and on their way to producing fruits and vegetables, it’s important to continue to feed them.
You can periodically add more organic compost to your soil from your compost bin.
Or, you can sprinkle fertilizer around the plants, based on the recommended amounts and frequency from the package instructions. I like using the following organic store-bought fertilizers:
Is there another way to feed your plants besides compost or fertilizer? Yes! My grandmother was an amazing gardener and taught me that the natural way is sometimes the best.
An easy way is to soak banana peels and/or egg shells in a large pitcher of cold water overnight. Make sure to cover the pitcher with plastic wrap to keep the odor from infiltrating your kitchen. Strain it in the morning, discard the peels and/or shells (or put them in your outdoor compost bin), then use the enriched water to feed the base of your tomato and vegetable plants. You can do this every 2 weeks or so.
How do banana peels help your plants/soil? Banana peel soaked water adds water-soluble minerals like calcium, magnesium, and phosphorus to your soil. This is a gentle method to fertilize your soil. Because the banana peels are soaked in water overnight, the minerals are diluted. This prevents chemical fertilizer burn to your plants.
How do egg shells help your plants/soil? Egg shell soaked water adds water-soluble minerals like potassium, magnesium, and phosphorus to your soil, which helps support strong cell walls in your vegetables. It also adds small amounts of calcium that build strong roots. This is a much gentler method than directly adding crushed egg shells into your soil. It’s especially helpful for fruit-bearing plants like tomatoes, squash, and peppers. This is also considered a diluted and weaker fertilizer that prevents chemical fertilizer burn to your plants. This means you can water your plants with this concoction more often than adding regular fertilizer. Once every 1-2 weeks works well.
Combination of egg shell & banana peel water: It has all the same benefits as noted above. You are adding water-soluble amounts of minerals like calcium, magnesium, potassium, and phosphorus to your soil. All these minerals will help support your soil and the overall health of your vegetables and herbs.
STEP 6 - CONTROLLING GARDEN PESTS & ANIMALS
There are lots of chemicals available to get rid of garden pests. However, if you want to use more natural methods to preserve your organic garden, below are some of the methods that have worked for my garden.
MY PREFERRED ORGANIC PEST CONTROL METHODS
What are some organic methods to deter pests from your garden? Companion planting is your first step to deterring pests in your garden. Once you’ve selected your main vegetable plants, research the best companion plants for each main plant.
Companion Flowers: Plant companion flowers in your garden bed in between your vulnerable tomato and squash plants. Companion flowers like MARIGOLDS, PETUNIAS, ZINNIAS, and CALENDULAS, are helpful to keep some small pests away from your main plants. They also bring helpful pollinators like bees, which will help your plants produce more fruits and veggies.
Companion Herbs: Another way to deter pests is to plant strong smelling herbs and vegetables like BASIL, GARLIC, SCALLIONS, or CHIVES near some of your vegetable and tomato plants.
Be sure to use the Old Farmer’s Almanac Companion Planting Guide before you begin planting, as you want to make sure they are beneficial to their neighboring plants.
Another way to check for the right companion herbs (or flowers) is to do a Google Search. For example, I’ve used the following phrases for a quick answer:
“What are the best companion plants for tomatoes?”
“Can I plant marigolds next to tomatoes?”
“Should I plant peppers next to tomatoes?”
Garlic Powder & Ground Black Pepper: Sprinkling garlic powder and/or ground black pepper directly onto the soil around your plants, seems to help deter some pests and the occasional squirrel. Do NOT sprinkle either on the leaves or stems of your plants.
Neem Oil: This method is probably the least offensive store bought product you can find to deter small pests from your organic garden.
Spray Bottles for Small Areas:
Bonide Captain Jack's Neem Oil - 32 ounce Spray Bottle is a ready-to-use multi-purpose fungicide, insecticide, and miticide for organic gardening. It works well if you are hand spraying only a few plants.
Smart Grower Neem Oil Plant Spray with Peppermint Oil - 32 ounce Spray Bottle is another ready to use spray for indoor and outdoor plants, vegetables, and herb gardens that is safe for the environment, plants, pets, and people when used as directed.
Bonide Captain Jack's Neem Oil - 128 ounce Spray Bottle is for larger gardens, and is a ready-to-use, continuous spray multi-purpose fungicide, insecticide, and miticide for organic gardening.
What are some organic methods to deter animals like raccoons and rabbits from your garden? I am all too familiar with this topic, as we have both of these animals frequenting my yard. Racoons eat with their hands and they don’t like anything spicy, so I found these methods to work well for my garden.
Cayenne Pepper: After experiencing our resident raccoon destroying my garden beds three times within a few weeks this year, I decided to try cayenne powder. Much to my surprise and relief, we haven’t had any more issues with the raccoons since trying the following method:
Water down the top edges of the wood around your raised garden beds. If you do not have raised beds, just water the perimeter around your vegetable garden.
Wear glasses and a mask, as the cayenne pepper can reek havoc with your eyes and sinuses.
Generously sprinkle cayenne pepper directly onto the wet wood or wet perimeter of your garden bed. The wetness will help prevent the pepper from blowing away. The water also helps it to turn into a paste, which sticks better to the wood.
In addition to the top edges of the wood, you can also sprinkle the cayenne pepper on the ground around the perimeter of the raised garden beds.
When it’s time to water your plants, avoid watering the sprinkled areas.
Repeat this process every 2 weeks, or whenever you see the cayenne pepper dissipating.
Coyote or Wolf Urine: I have not used these in my own garden, but know a few individuals who have had success with using either of the products below. They are definitely a more expensive option, but it’s good to have a back up in case the above methods do not work for your area.
HASSEN Coyote Urine is 100% pure coyote urine and simulates predator presence for prey animals, like squirrels, rabbits, and raccoons. It creates a territorial marking scent barrier for home and outdoor use.
HASSEN Wolf Urine is 100% pure wolf urine. Similar to coyote urine, this simulates predator presence for prey animals, and acts as a deterrent for small, local animals, like squirrels, rabbits, and raccoons. It also creates a territorial marking scent barrier for home and outdoor use.
OTHER METHODS FOR CONTROLLING PESTS
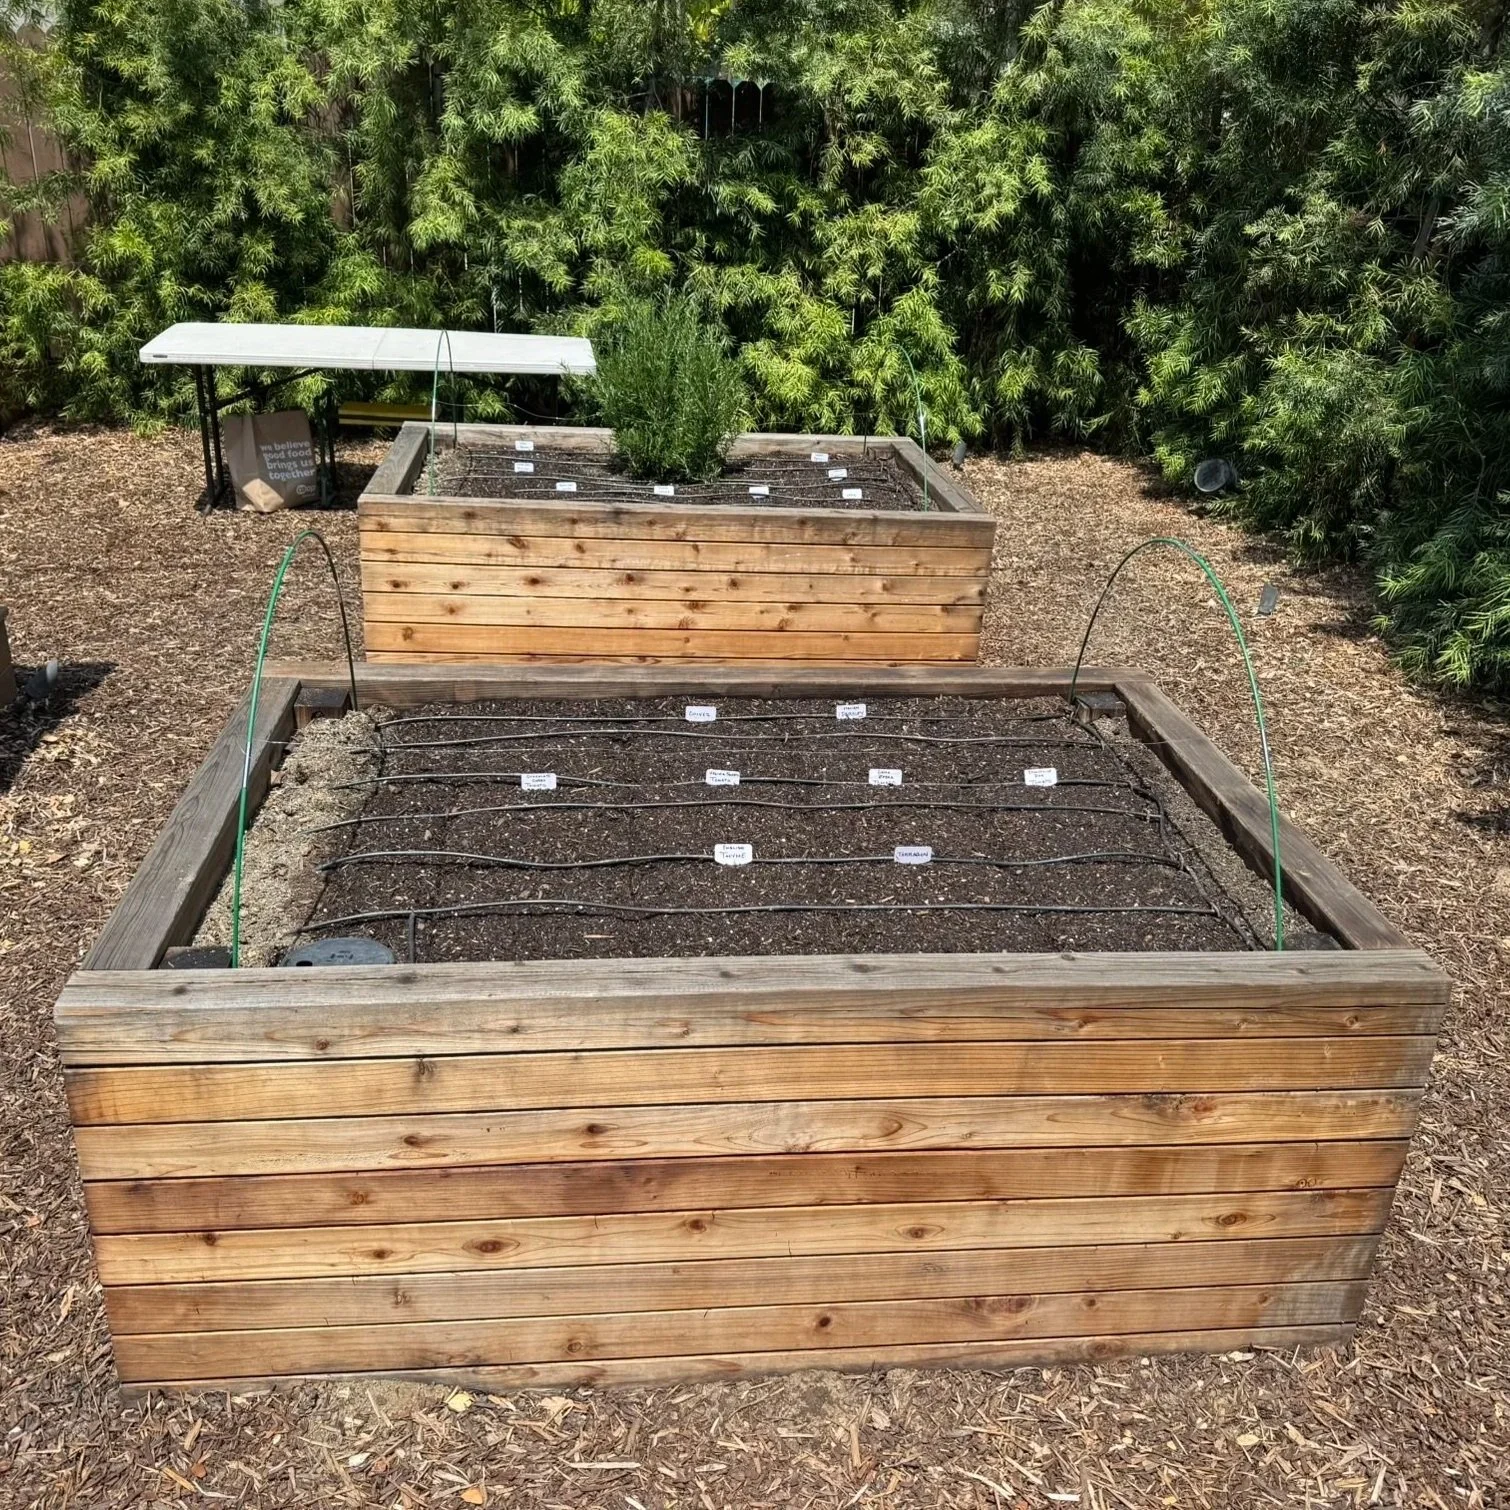
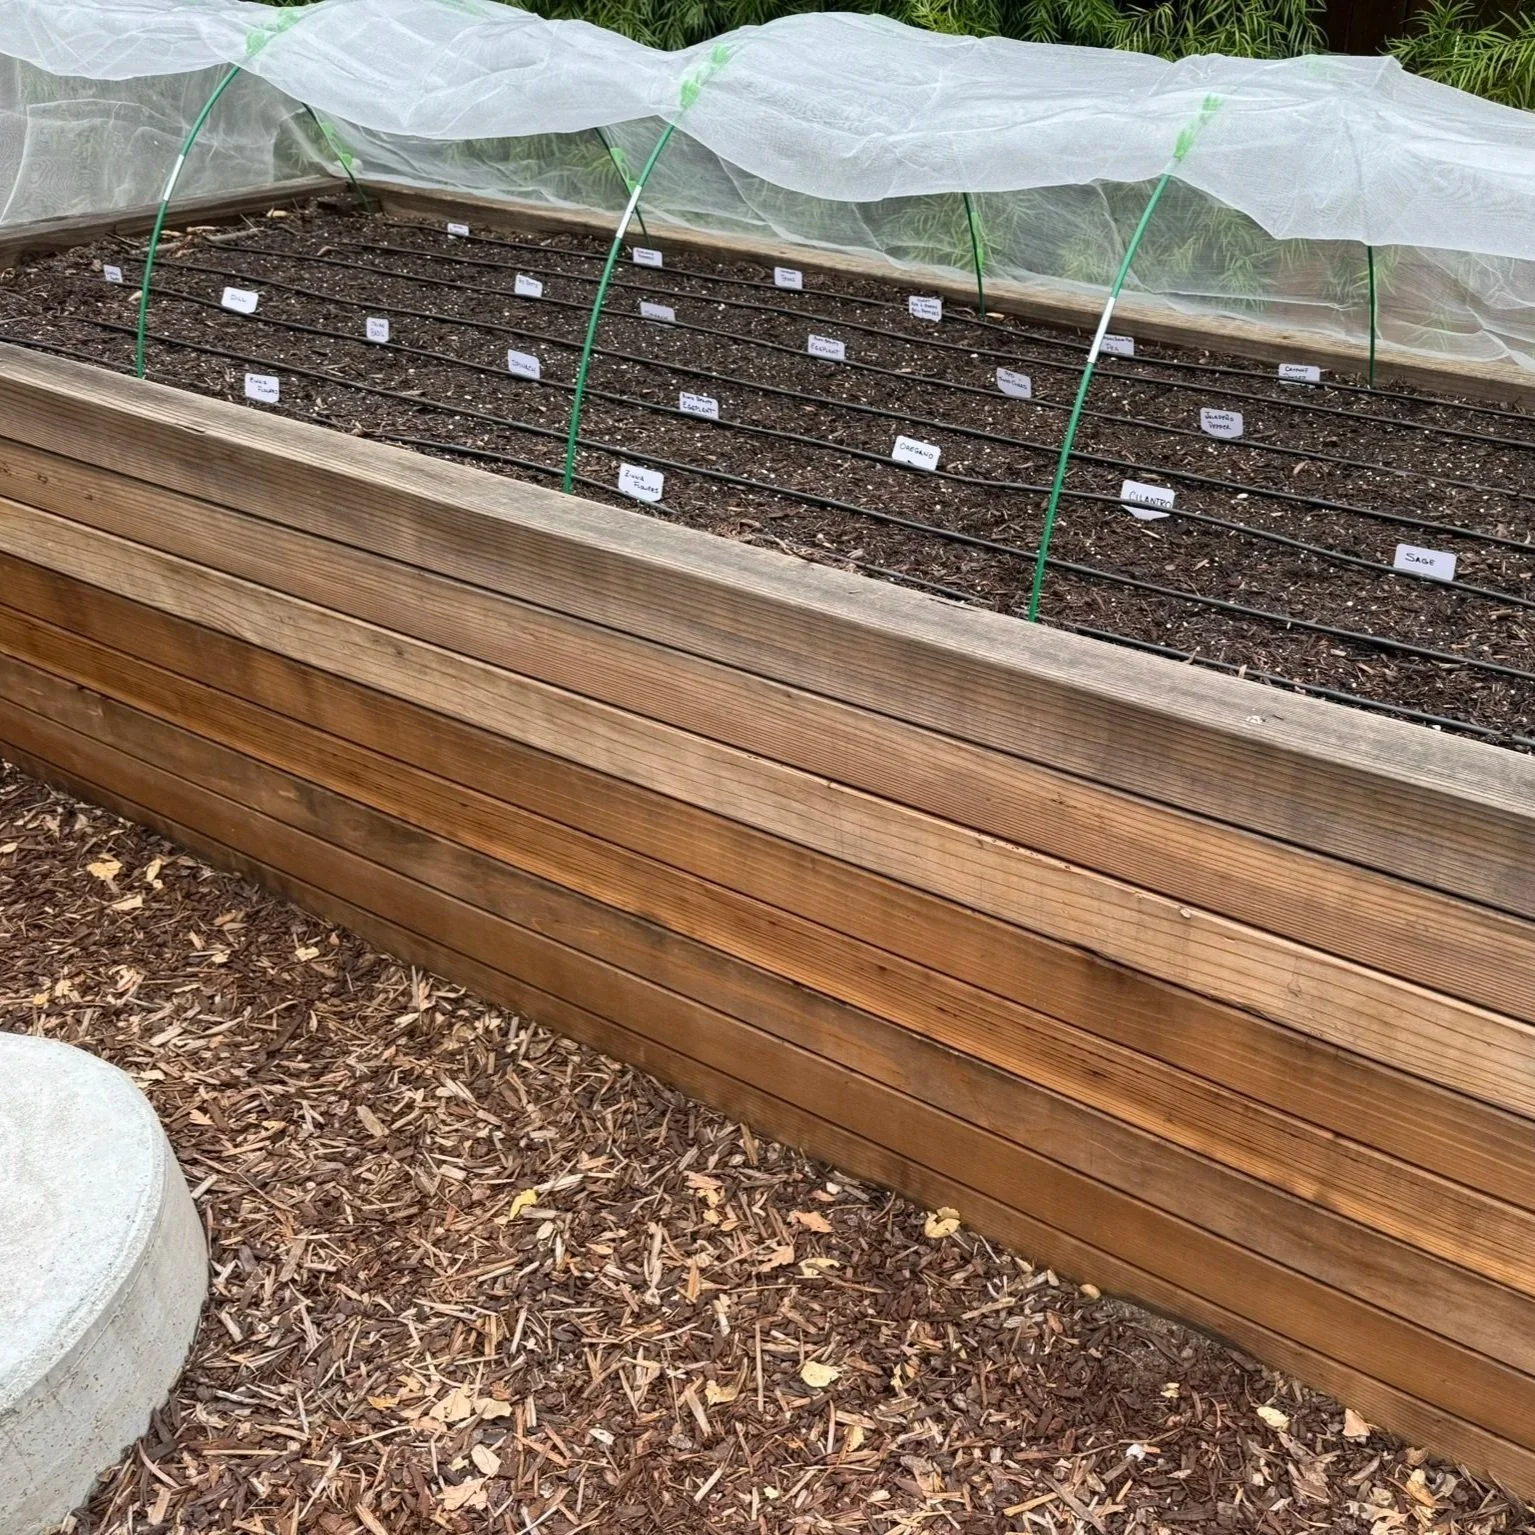
Are there other methods to deter pests and critters that don’t require spraying or sprinkling anything on my garden? Yes! The other method to deter some pests, birds, squirrels, rabbits, rats, and raccoons, is to use hoops and netting, or net bags. Below are some example photos of the hoops and netting I used over each of my garden beds in 2025.
Hoops for Garden Beds: These Garden Hoops for raised beds are an easy way to create a base for draping the netting over your garden beds.
These hoops work well for both ground and raised garden beds. They create a grow tunnel with adjustable fiberglass, rust-free tubes that are easily bendable so you can form them to your garden bed.
FuBegi 36 Piece Hoop Set with 24 Clips for smaller garden beds.
FuBegi 60 Piece Hoop Set with 40 Clips for larger garden beds.
Greenhouse Hoops Grow Tunnel with 10 Sets (41.3 x32 Inches) with 30 Clips for taller and wider plants in ground or raised garden beds.
Netting for Garden Beds: This ultra fine netting allows airflow, but is tightly woven enough to keep out small pests. They come in various sizes to fit virtually any size garden bed, including 4×10 ft, 6.5×10 ft, 8×20 ft, 8×25 ft, 10×20 ft, 15×20 ft, and 10×33 ft. The following sizes worked well for my raised beds.
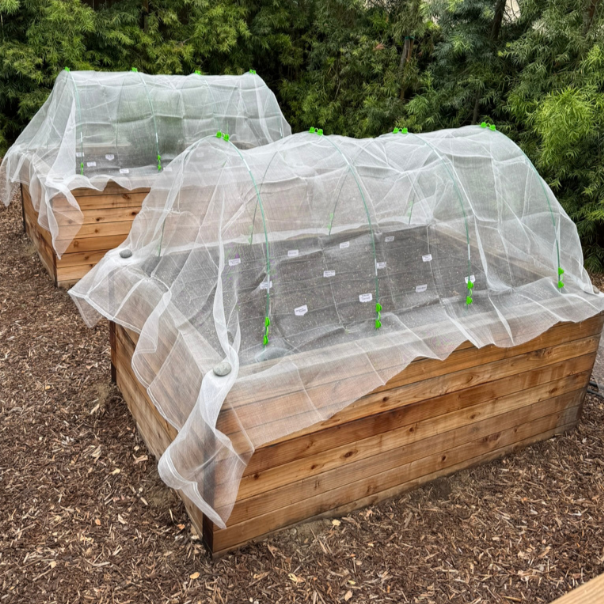
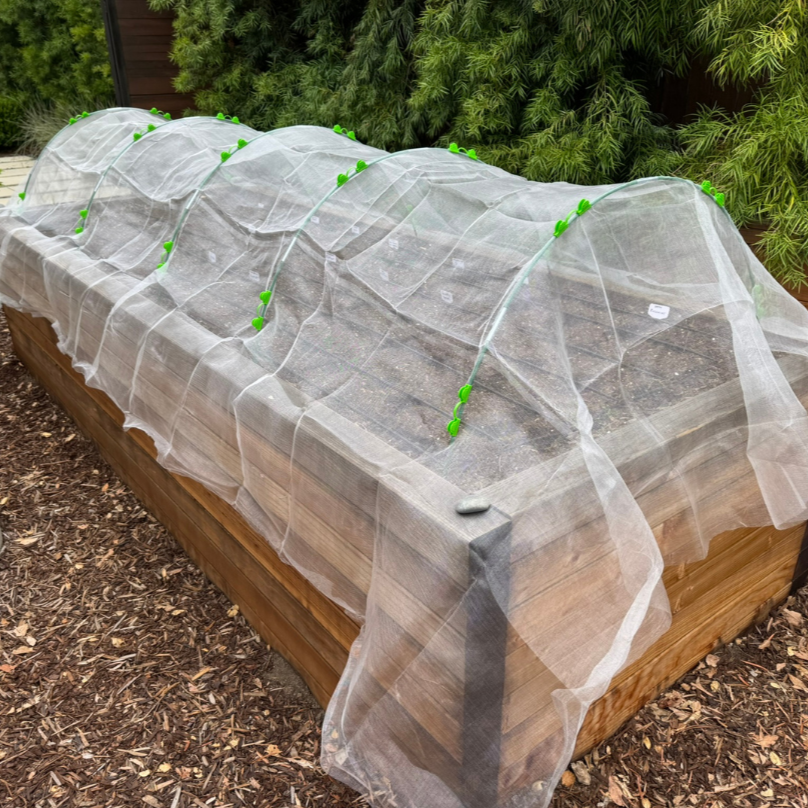
Individual Net or Mesh Bags for Fruits & Vegetables: If you don’t want to go through the process of covering your entire garden, net or mesh bags are a great option. These bags allow the plants to achieve full sun, while protecting the individual fruits and vegetables from hungry critters, like birds, squirrels, rats, gophers, rabbits, and raccoons.
Morcheiong Reusable Garden Mesh Netting with Drawstring - 60 Bags - 6 x 8 Inches Each to protect smaller individual fruits and vegetables, like tomatoes, citrus fruits, berries, etc., from pests and animals.
CHolic Stainless Steel Wire Mesh Bags - 25 Pieces is a great option to prevent those relentless critters that can chew threw regular fabric or plastic mesh bags. Made with 304 stainless steel wire, these bags offer stronger protection for your smaller individual fruits and vegetables.
Alpurple Mesh Netting Bags with Drawstring - 2 Pack (4.9x3.2 Feet) for larger shrubs, like tomato plants and small citrus trees.
OZMI Garden Mesh Netting with Zipper - 2 Pack (6x6 Feet) for larger fruit trees, blueberry bushes, and larger shrubs.
MY FAVORITE PLANTING TOOLS
With so many garden tools available, it’s challenging to narrow down the most necessary tools for your garden. The products listed in this section are some of my favorite tools for beginner and seasoned gardeners. Just click on the links or the product images below to find them on Amazon.
What are the best gloves for gardening? What works best for me is to have two types of gloves on hand. Depending on the type of gardening you are doing, you’ll need a sturdy pair of gloves and a more comfortable/flexible pair of gloves that still protects your hands from thorns, and spikey stems and leaves.
Flexible & Comfortable:
Sturdy for Heavier Yard Work, Gardening, Pruning & Planting:
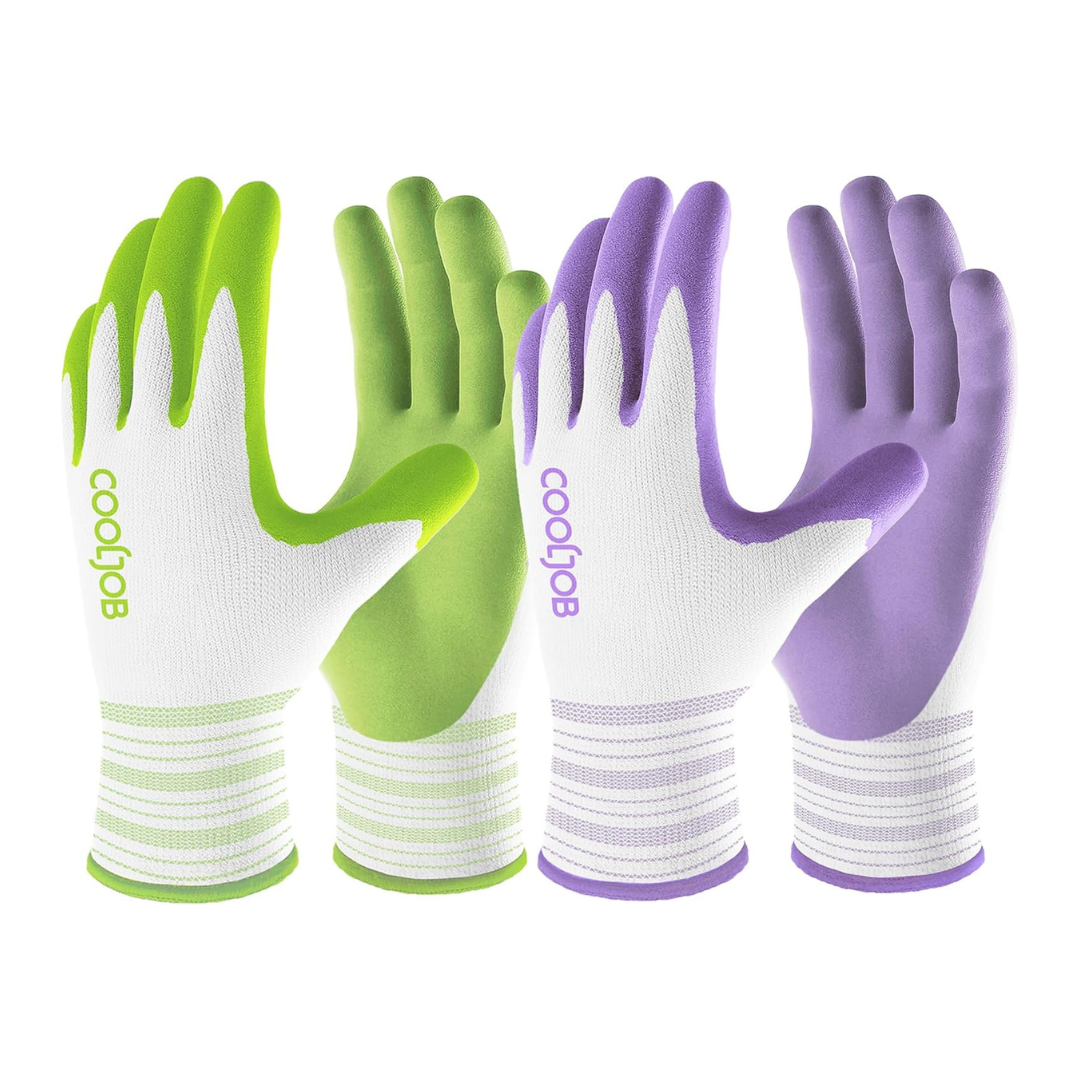
COOLJOB Gardening Breathable Rubber-Coated Gloves for Women (2 Pairs)
These women’s gloves are soft and stretchy for comfort, and protect your palms and fingers with a flexible rubber coating.
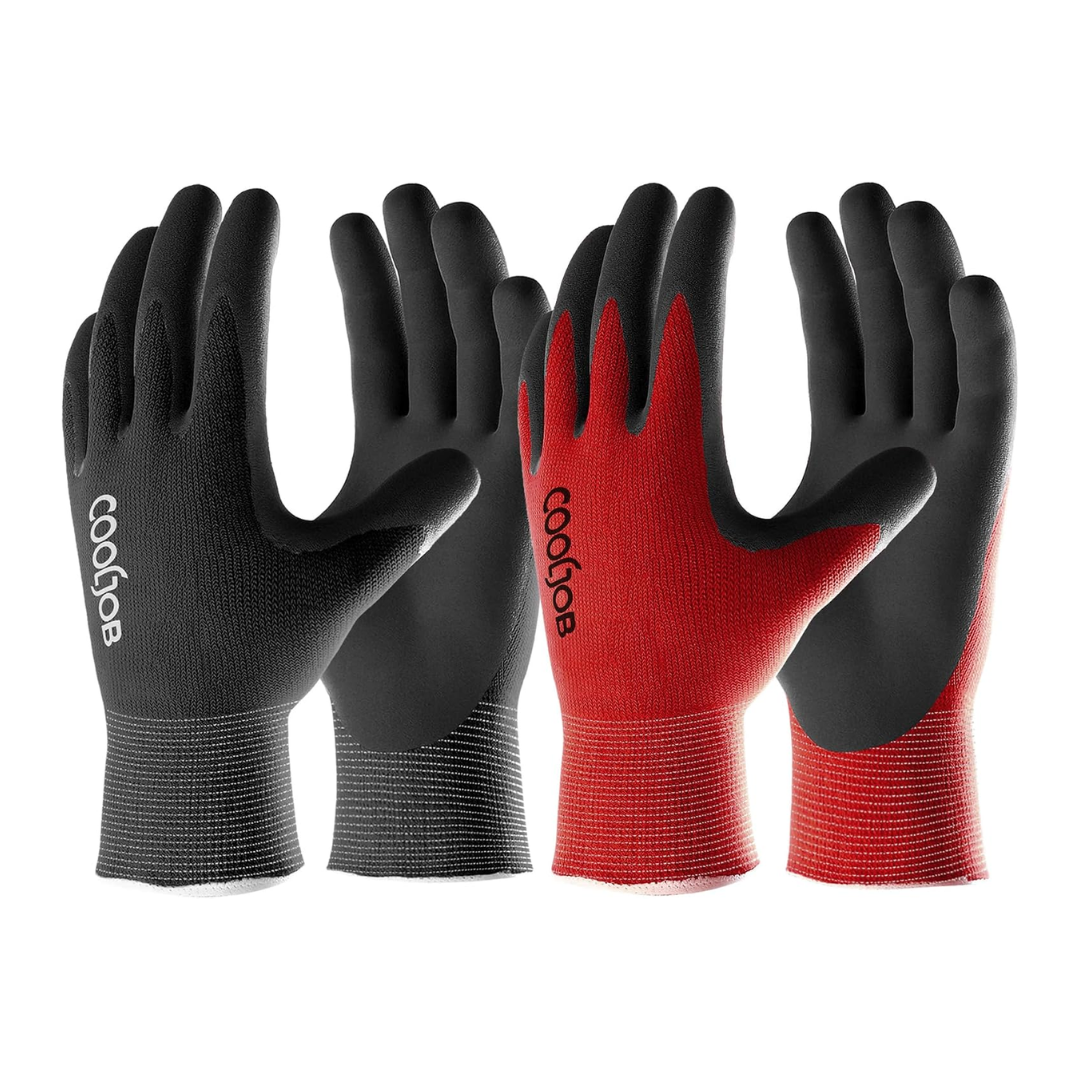
COOLJOB Gardening Breathable Rubber-Coated Gloves for Men (2 Pairs)
These men’s gloves offer the same soft and stretchy comfort, and protection for your hands with a flexible rubber coating.
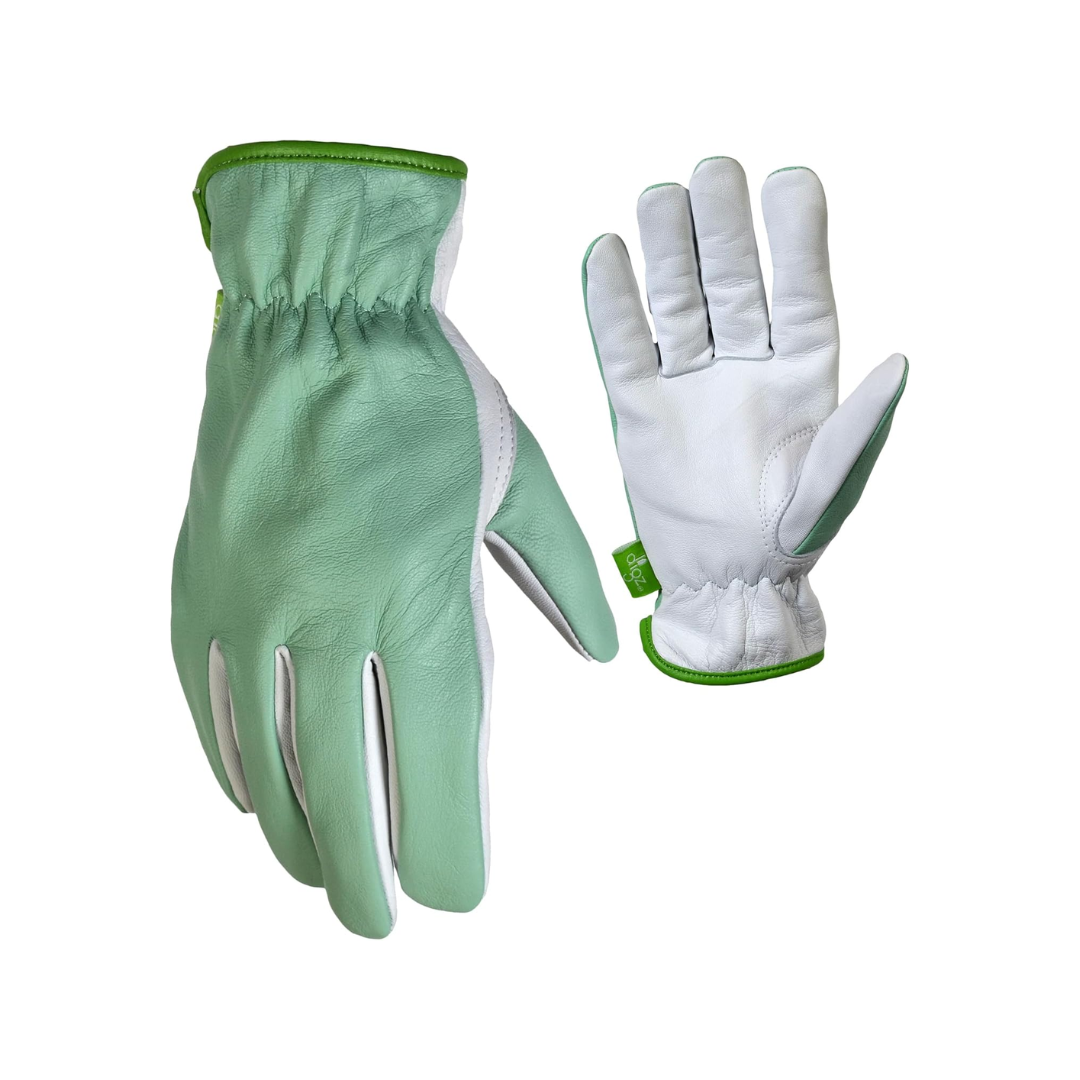
DIGZ Goatskin Gardening Gloves (1 Pair)
Full-grain leather gloves with keystone thumb & elastic wrist for flexible comfort for heavy yard work & gardening.

Wells Lamont HydraHyde Leather Water-Resistant Work Gloves for Men (1 Pair)
Soft and flexible, but sturdy enough for heavy yard work & gardening. Perfect for handling garden tools.
How do you get even squares or rows in your vegetable & herb gardens? To make straight lines and/or rows in your garden, you can certainly use the old fashioned way with posts and strings. However, I found an easy tool to create perfect 12 inch squares in my garden. Once you’ve decided on your garden plants, you can use this tool for perfect spacing and to create holes to evenly space out your seedlings or seeds. It’s easy enough for a child to use, which is a great way to introduce them to outdoor gardening.
Seeding Square Planting Tool Kit: Easy to use for beginner gardeners. And, for advanced gardeners that want an easier way to plant their garden beds.
What can I use to properly support tomato plants & climbing fruit plants? You can use a heavy-duty trellis or tomato cages.
Adjustable Square Tomato Cages: Instead of the old-fashioned galvanized wire cages that bend with any weight and are impossible to store out of season, I prefer square tomato cages that are heavy duty plastic. They are easy to assemble, quick to disassemble, and easy to store.
Heavy Duty Adjustable A-Frame Rust-Proof Metal Garden Trellis: For a heavy duty trellis, I like an A-frame with a grid design that is rust-proof. It’s perfect for heavier climbing vegetable plants, melons, or pumpkins.
Sturdy Rustproof Metal Pyramid Obelisk Garden Trellis: This is a more aesthetic way to support your climbing garden plants. The simple design and rustproof metal allows for all season use. It can be assembled in under 10 minutes, and each section screws apart and stacks for easy storage.

Seeding Square Planting Tool Kit for Seeds & Seedlings - Great for All Ages!
Just press this gardening template into the soil, poke, and plant! Kit comes with built-in ruler, color coded spacing tool, planting guide & magnetic dibber.

Adjustable Square Tomato Cages - Up to 47 Inches (3 Pack)
Sturdy garden trellis for in-ground or raised garden beds. Easy to assemble and adjustable. Great for tomatoes, climbing plants like flowers, beans, and fruit plants.
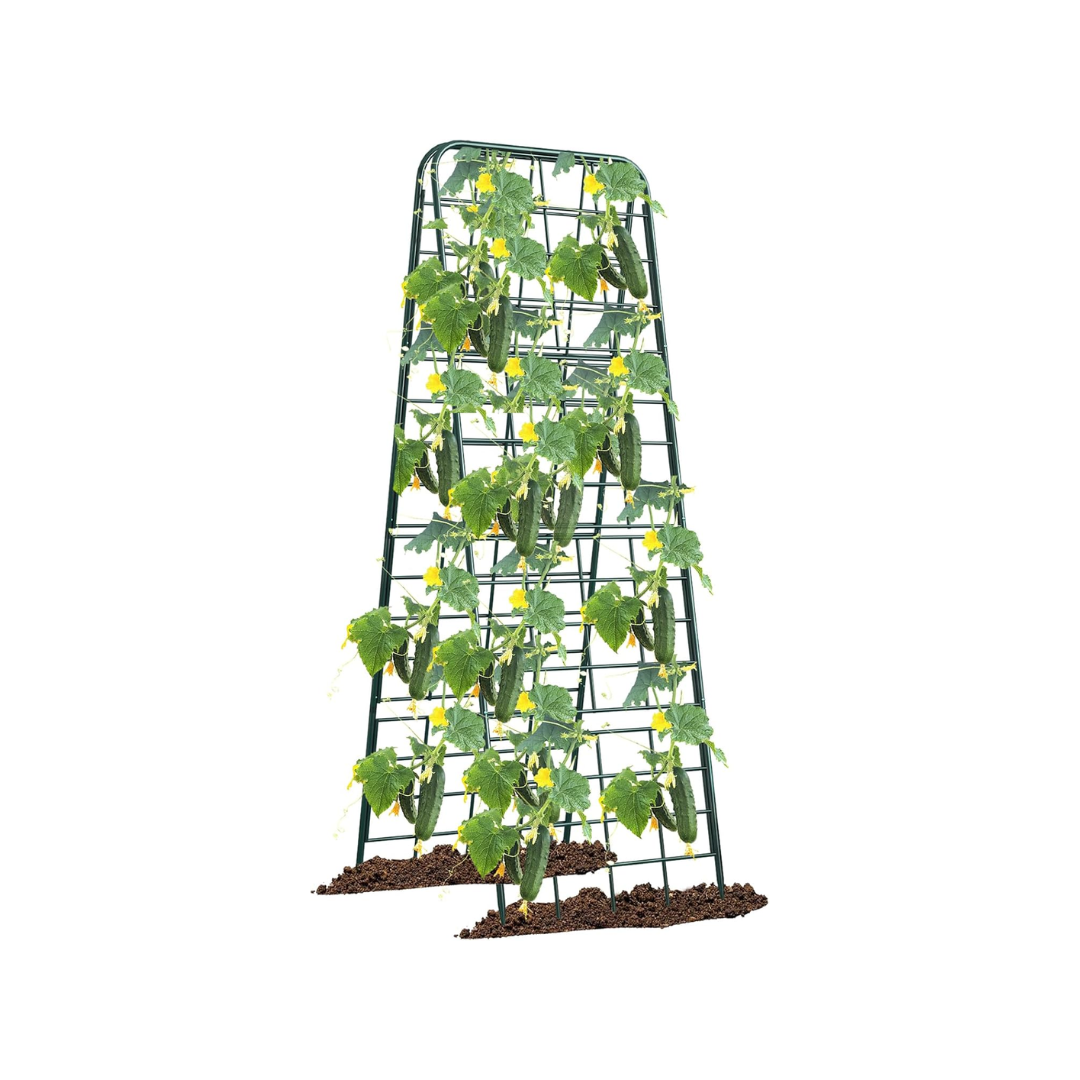
Heavy Duty Adjustable A-Frame Rust-Proof Metal Garden Trellis (50x17 Inches)
The dense grid design is perfect for in-ground or raised garden beds to support tomatoes, cucumbers, or heavy melons or pumpkins. Easy to store, collapsible design.
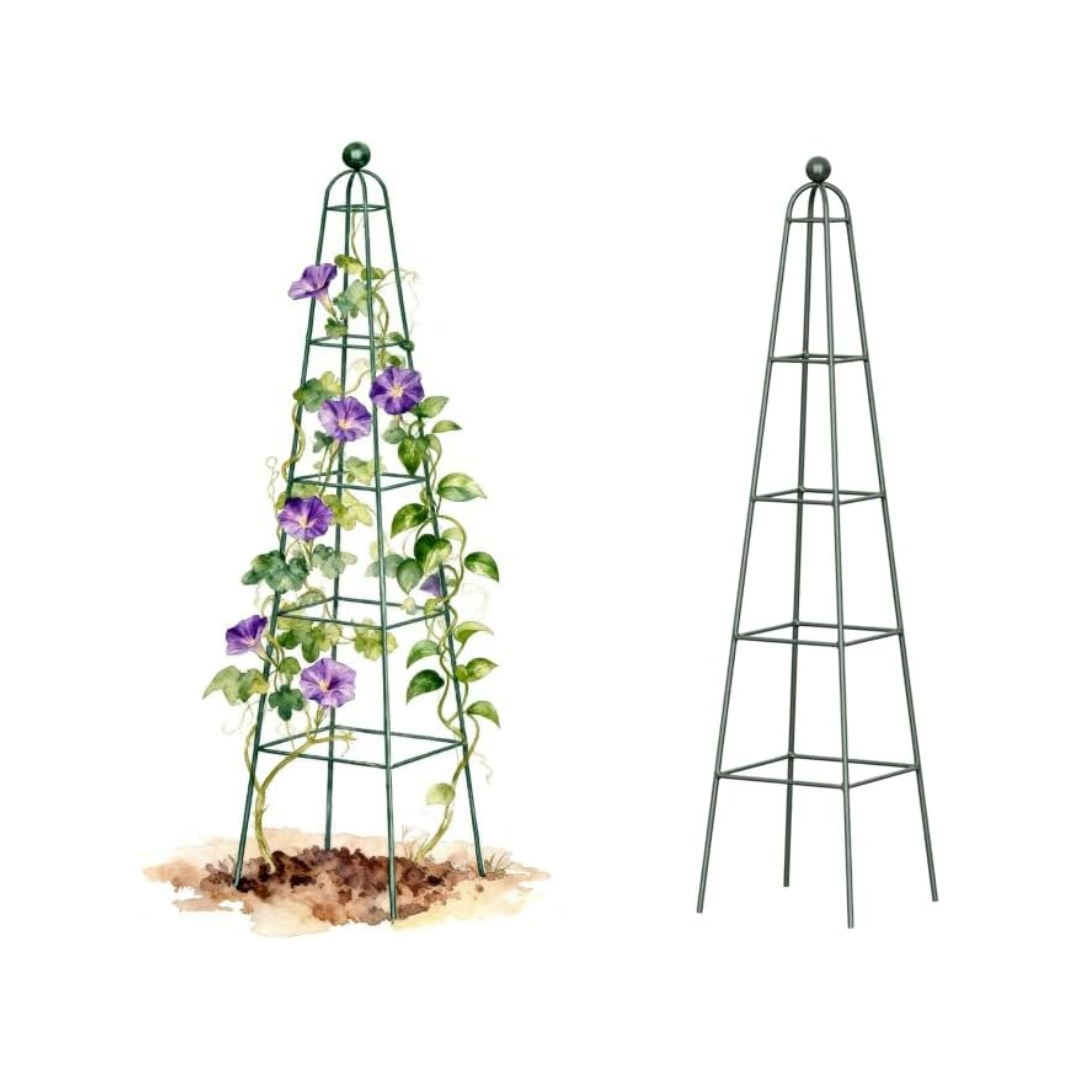
Vego Garden Pyramid Obelisk Garden Trellis, Rustproof Metal (6.5 Feet)
Rustproof for all season use in more aesthetic in-ground and raised garden beds. Sturdy square base with adjustable height for climbing plants and vegetables.
What are the most useful garden tools? You’ll need some smaller hand tools, pruning sheers, and clippers, as well as a shovel.
Basic Garden Hand Tools for Smaller Jobs: For gardening that requires scooping, planting, or transplanting smaller plants, use a trowel, cultivator, and transplanter. Fiskars is a tried and true brand that makes good quality products. I like this set of three tools, which is reasonably priced and well made. You’ll also need a pruning snipper for easy pruning of herbs and more delicate vegetables. For larger branches (up to ¾ inch thick), you’ll need pruning shears. However, my favorite garden tool is a multi-purpose garden knife with an 8.14 inch blade. It has a sharp, v-shaped nose and it’s narrow enough to dig a hole for a plant (even in a crowded garden bed). It also removes tougher rooted plants and weeds easily, and does a decent job of scooping and replacing soil around newly planted delicate herbs and veggies.
Fiskars 3-Piece Set - Garden Hand Tools Set with Trowel, Transplanter & Cultivator
Fiskars Non-Stick Pruning Snips - Resin-Resistant Garden Scissors (6 Inch)
Decerk Professional Pruning Shears - Ultra Sharp Japanese Steel Titanium Blade
Root Slayer Heavy Duty Digging, Weeding & Planting Knife (8.14 Inch Blade)
Heavy Duty Hand Tilling & Shoveling: From year to year or season to season, you will need to loosen and turn over your soil. This is called tilling the soil. For smaller gardens (in-ground or garden beds), I like to use an old-fashioned shovel. It gets into the dirt more easily than smaller tools. Just wear heavy duty gloves (like the leather gloves in the product photos below, and sturdy shoes). To make your digging or large transplanting jobs even easier, I found these two shovels to glide through tough terrain (even rocky or hard clay soil) more easily. Plus, they are more streamlined, so they don’t disturb the surrounding plants, as a standard shovel would.
Ashman 41 Inch Heavy-Duty Digging Shovel with Trenching Blade & Comfortable Handle
This design is your good old-fashioned, standard shovel that does the job of picking up tons of dirt and turning it over. This tool is ideal for tilling larger garden beds, and can also be used for digging gravel.
Spear Head has smooth edges, but glides nicely around crowded garden beds.
Root Slayer 44 Inch Garden Shovel with Serrated Blade (13 Inch Blade)
Root Slayer has an ergonomic and uniquely shaped handle, along with a narrow shovel and serrated blade edges. Great for heavy duty digging in tougher soil and through thicker rooted plants.

Fiskars Garden Hand Tools Set with Trowel, Transplanter & Cultivator (3-Piece Set)
For scooping, planting, or transplanting smaller plants in your garden. Long lasting, easy to grip handles make this set a basics must have.
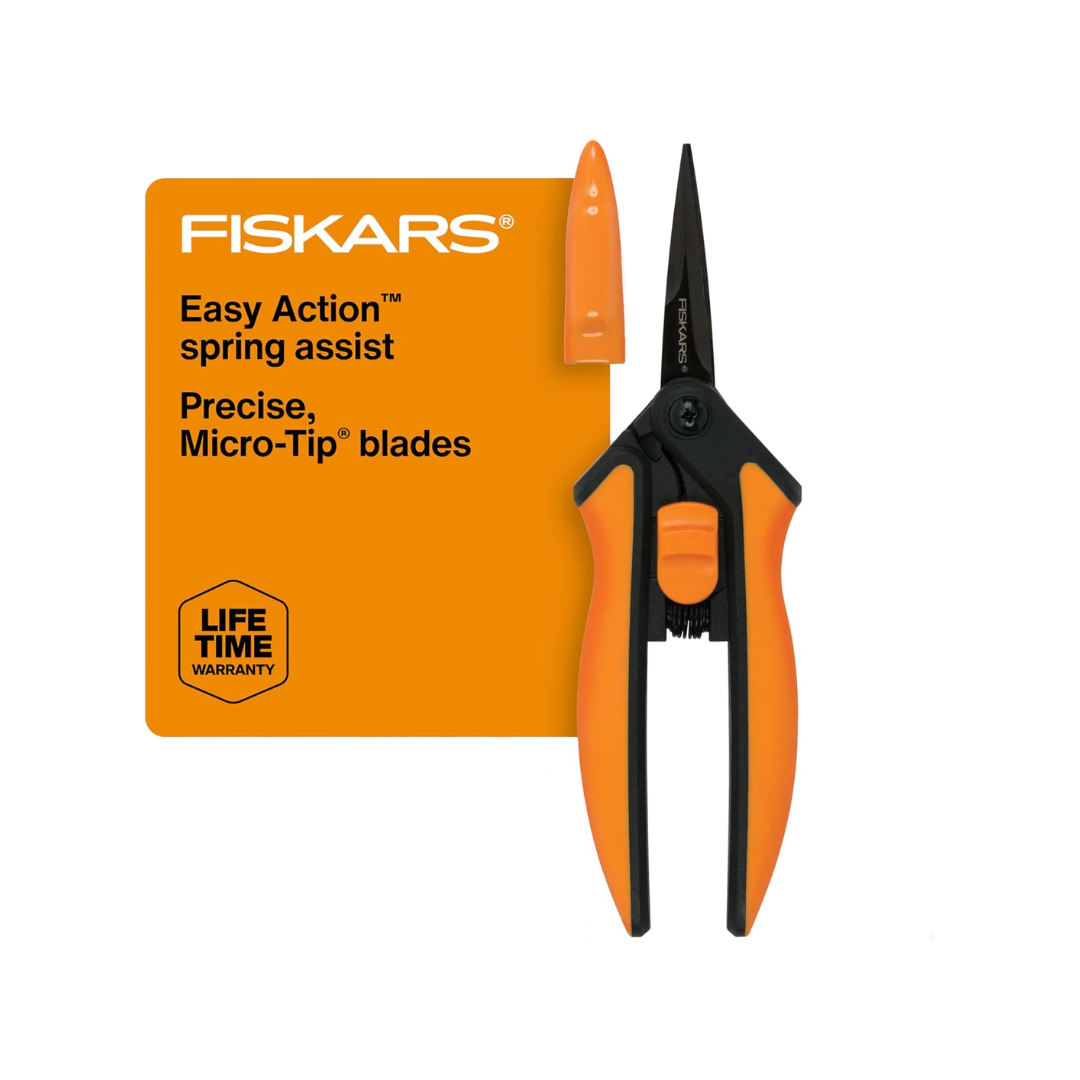
Fiskars Non-Stick Pruning Snips - Resin-Resistant Garden Scissors (6 Inch)
Garden snippers for herbs, small plants, and delicate vegetables and fruits. Non-stick steel blades & easy action spring make it easy to cut through sticky branches.

DECERK Professional Pruning Shears - Ultra Sharp Japanese Steel Titanium Blade (8.5 Inches)
Effortless cutting and pruning larger branches (up to 3/4 inch). These garden shears are arthritis friendly garden scissors & clippers.
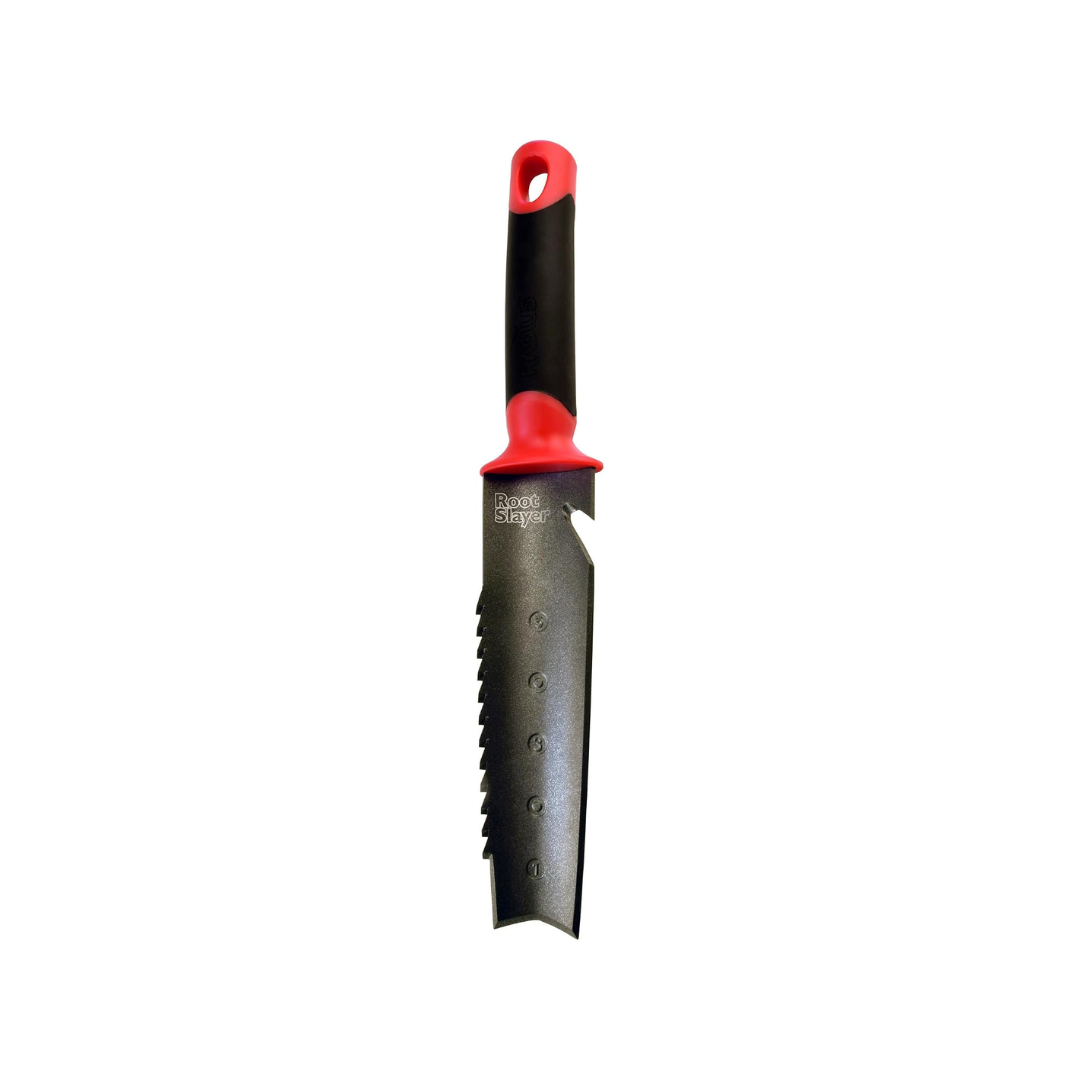
Root Slayer - Heavy Duty Digging, Weeding & Planting Knife (8.14 Inch Blade)
My favorite multi-purpose garden tool. It weeds, plants, digs, and removes plants easily with a sharp, flat nose and serrated edge.

Root Slayer 44 Inch Garden Shovel with Serrated Blade (13 Inch Blade)
With its serrated edges this narrow shovel easily digs through the toughest soil without disturbing the surrounding plants in your garden beds.

Ashman 41 Inch Heavy-Duty Digging Shovel with Trenching Blade & Comfortable Handle
Standard shovel design that does a great job of picking up lots of dirt in each scoop and turning it over. Ideal for tilling larger garden beds & digging gravel.
MY FAVORITE GARDEN PRODUCTS & ACCESSORIES
Store seeds, secure each plant, and harvest all your vegetables and herbs with these affordable accessories. Just click on the links or the product images below to find them on Amazon.
ORGANIZING SEEDS & PLANTS
What is the best way to keep track of each seed or seedling I planted? You can refer to your original garden plan layout, but once your plants have grown and need occasional fertilizing it’s best to have an at-a-glance method while your out in the garden. In my opinion, labeling is a must when it comes to planting garden beds. It makes it easy to identify each plant (before the vegetables have started sprouting), and easier to determine which plants didn’t succeed in that area of soil. I found these cost effective labels to do the job.
Waterproof Plant & Seed Labels with Permanent Marker for an economical hand labeling system for your garden beds that will last with harsh weather.
Bamboo Plant & Seed Labels with Marker Bamboo is a sustainable and renewable resource. Coupled with a large writing surface, these garden are a great choice for the environmentally conscience gardener.
Bamboo Pre-Printed Garden Labels for Herb Gardens (12 Garden Stakes - .95 x 6 Inches) these bamboo garden tags are pre-stamped with the names of 12 of the most common garden herbs. Another sustainable choice that is great for herb gardens and potted plants.

Waterproof Plant & Seed Labels with Permanent Marker (200 T-Type Garden Tags - 1.18 x 2.36 x 3.94 Inches)
These garden labels and marker are resilient in all types of weather. In rain, snow, and extreme heat, these labels are sturdy plastic that have lasted in my own garden.

Bamboo Plant & Seed Labels (100 T-Type Garden Tags - 1.4 x 2.36 x 4 Inches)
For a sustainable choice with a large writing surface, these garden tags are a great choice for the environmentally conscience gardener.
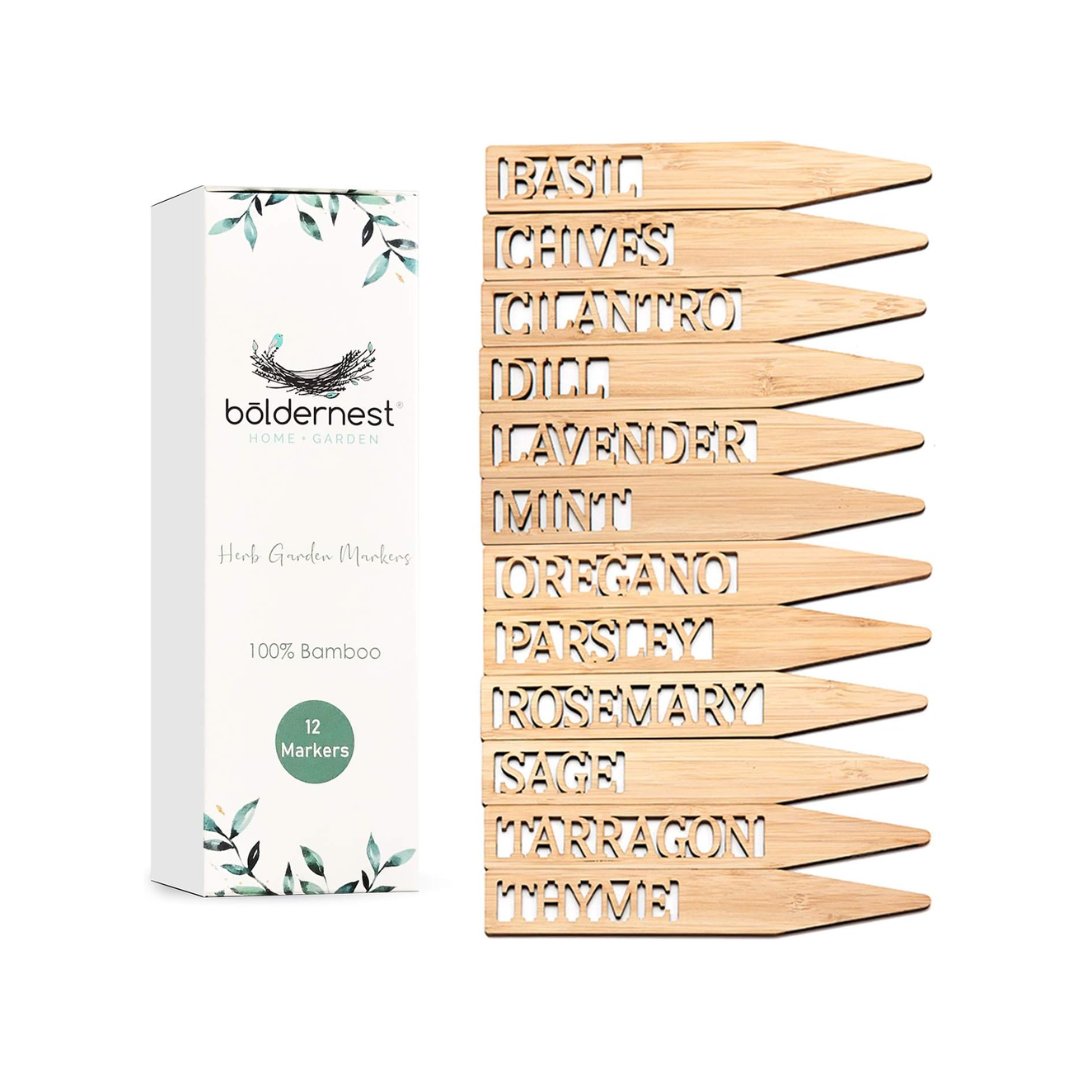
Boldernest Bamboo Pre-Printed Garden Labels for Herbs (12 Garden Stakes - .95 x 6 Inches)
These pre-stamped bamboo garden labels are perfect for your herb garden, and are a sustainable choice for the environmentally conscience gardener.
What is the best way to organize and store all my garden seeds? If you are like me, I only start my garden with seeds. There is nothing more gratifying than watching a seed that you planted yourself turn into a prolific fruit bearing plant. After buying loads of organic seeds, I found the following two storage methods to work best for me.
Seed Storage Organizer Box with Zipper (140 Slots, Bottles, Labels, Envelopes, Tweezers & Funnel) My favorite way to store and preserve seeds is by using these small, clear bottles that fit snugly into each slot. With 140 slots, each bottle is airtight and protects your seeds from moisture and temperature spikes so you’ll have useable seeds for years to come.
Seed Storage Organizer Box with Insulated Bag & Labels (Holds 80-200 Seed Envelopes) For those that want to store their seeds in the original seed envelopes but want to protect them from moisture and temperature spikes, this organizer box has 26 plastic covers for seed envelopes, and an insulated box to preserve seeds.
How do I secure various sized branches or delicate plants without breaking them? You can certainly use standard garden tape, but I find it to break and/or curl as the plant grows, or disintegrate in extreme heat. I prefer using a couple of methods to secure each fruit bearing branch or climbing plant, depending on it’s size and structure. These two products have replaced standard garden tape and flimsy garden clips in my vegetable garden.
Garden Tie Green Tape is a sturdier and longer lasting version of standard garden tape. It’s made of a soft material that stays secure but doesn’t hurt plants. This product is waterproof, heat resistant, and reusable, and comes in a 16.4 feet x 0.6 inch roll. This double sided tape is an economical option that can be cut to size and straps onto any size vegetable or herb plant, like tomatoes, grapevines, climbing cucumbers or squash plants, and trellises.
Plant Support Clips for Supporting Climbing & Vegetable Plants (80 Clips) are reusable and long lasting for securing seedlings and growing vegetable and garden plants to stakes and trellises. These easy to use clips are constructed with a strong plastic and non-rusting, sturdy spring steel wire to create a secure hold on various size stems and branches. Comes with 30 large clips (1.8 x 2.4 Inch) and 50 small clips (1.6 x 1.2 Inch). Best for use on small to mid-sized stems and branches.

Seed Storage Organizer Box with Zipper (140 Slots, Bottles, Labels, Envelopes, Tweezers & Funnel)
This is my favorite way to store and preserve seeds. The bottles provide the perfect way to store seeds in this compact zippered storage organizer.

Seed Storage Organizer Box with Insulated Bag & Labels (Holds 80-200 Seed Envelopes)
To store your seeds in their original seed envelopes & protect them from moisture and temperature spikes, this organizer box includes plastic covers & an insulated box.
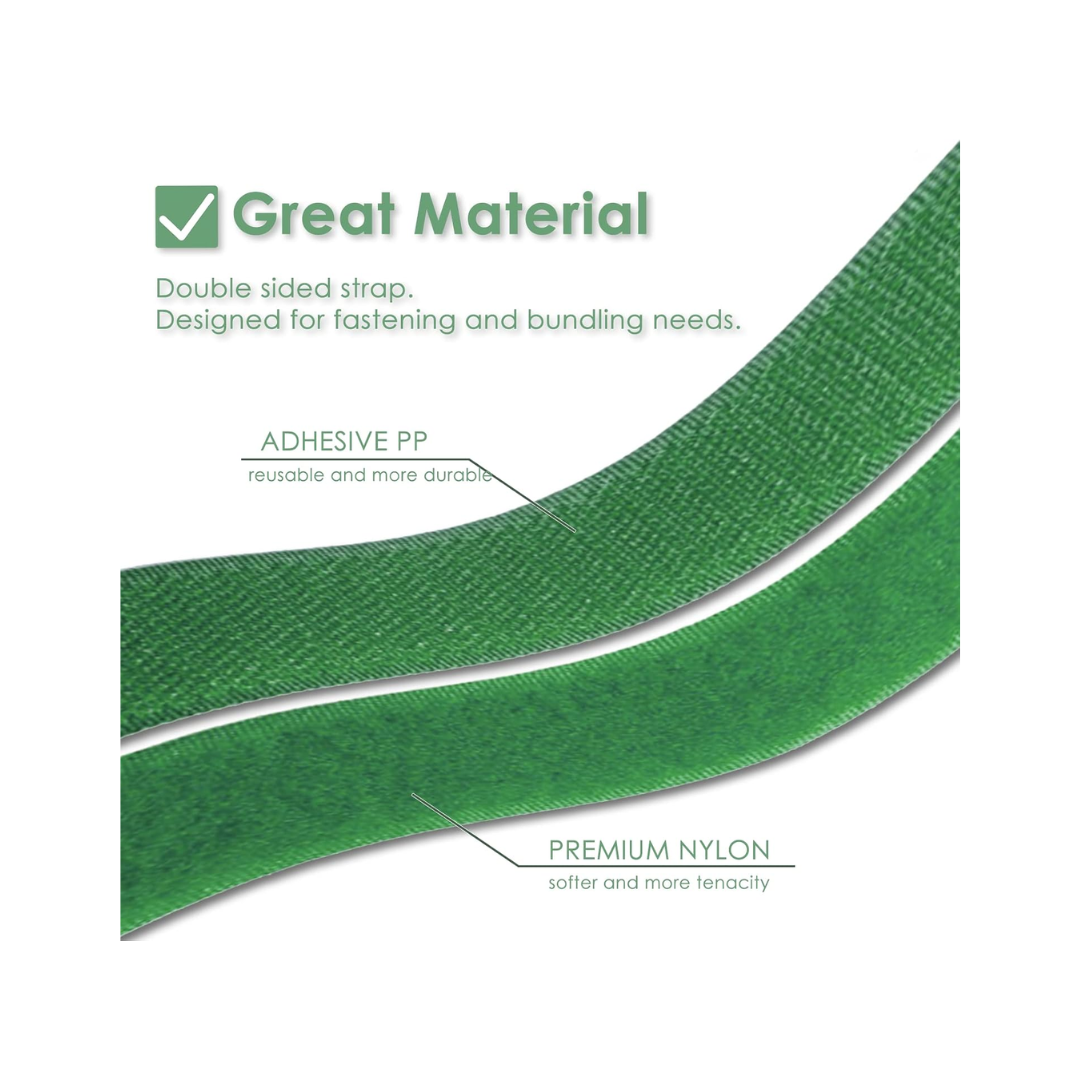
Reusable Garden Tie Green Tape - 16.4 Feet x 0.6 Inch Roll
An economical, secure & longer lasting garden tape that is waterproof, heat resistant & reusable. Can be cut to size for tomatoes, grapevines, climbing cucumbers and/or squash plants, trellises & more.

PERSZEN Plant Support Clips for Supporting Climbing & Vegetable Plants (80 Clips)
Comes with 30 large clips (1.8 x 2.4 Inch) and 50 small clips (1.6 x 1.2 Inch).
What size harvest basket is the most useful? There are so many beautiful woven wicker style harvest baskets available, but they are bulky and tend to mold and deteriorate with any moisture. With fixed handles, they can be challenging to store. The two options below are my favorite style harvest baskets. I have found that having both a medium and extra large basket on hand, covers all my harvest needs.
Metal Mesh Steel Harvest Basket - Medium Size (14.5 x 9.5 x 7 Inches) Unlike woven or wicker baskets that disintegrate, this steel mesh basket is durable can be used as more than a basket. It can be used to harvest vegetables and herbs, as well as a colander to rinse of vegetables immediately after harvesting. With its thick wooden handle and sturdy steel basket, it’s large enough for most large, heavy vegetables like butternut squash, as well as all fruits and herbs. It’s also a reasonable size for easier storage.
Fiskars Garden Harvest Basket with Tool Caddy - Extra Large (14 x 15.25 x 5.38 Inches) Made of durable plastic, this extra large harvest basket is both practical and versatile, making it easy to harvest and clean both large and small produce. Molded into three sections, this basket has a center compartment for your harvest tools, a second compartment for clean produce, and third compartment with a colander base to wash your veggies & herbs. Two fold-down handles make it easier to store. This basket is even strong enough and large enough to carry my overgrown vegetables like my 20 inch - 7.25 pound zucchini squash!
What garden seats would you recommend that don’t tip over easily? Garden seats are not usually necessary if you have raised garden beds above 28 inches tall, but in my opinion they are necessary for in-ground garden beds. Unless you are very young or have an extremely strong core and lower back, I have found that using a garden bench can help prevent the inevitable backache that seems to occur every time I’m stooping over a garden bed for hours. Whether it’s a convertible sitting or kneeling garden bench, or a rolling garden cart with a swivel seat that makes it easy to weed or prune in-ground gardens, the following two products are two I have found to be very useful.
Foldable Garden Seat with Wide Kneeling Pad & Tool Pouch If you are looking for a thicker garden seat that doesn’t tip and supports more weight, this product is a good choice. It has an extendable leg base that is considered that prevents the seat from tipping, and comfortably supports up to 420 pounds of weight. It comes with a handy tool pouch that sits on the edge of the thick, cushioned bench seat, and it can be flipped over to use when kneeling. Foldable and easy to store, this is a stronger bench for those that want to save their backs from bending over, and want more support when kneeling in the garden.
Rolling Garden Cart with Swivel Seat, Steering Handle & Utility Tool For gardening enthusiasts that want a rolling option, this rolling garden cart has so many features. With durable 9.8 inch rubber tires that move smoothly on grass, gravel and concrete, a 360° rotating swivel seat with adjustable seat height from 19 - 23 inches, an extendable steering handle that reaches 21 - 30.5 inches, wire storage basket, and under-seat plastic tray for tools, this is a great option for gardeners that want a multi-functioning rolling cart. Although it has a coated metal frame, I recommend storing it in an enclosed space (like a garage or storage shed) that is waterproof. There have been a few reviews that said it started to rust after a few years, I did not have that experience because I stored it in my garage. Overall size of this product is 31.5 × 18.1 × 33.8 inches.
HARVEST BASKETS & GARDEN CARTS
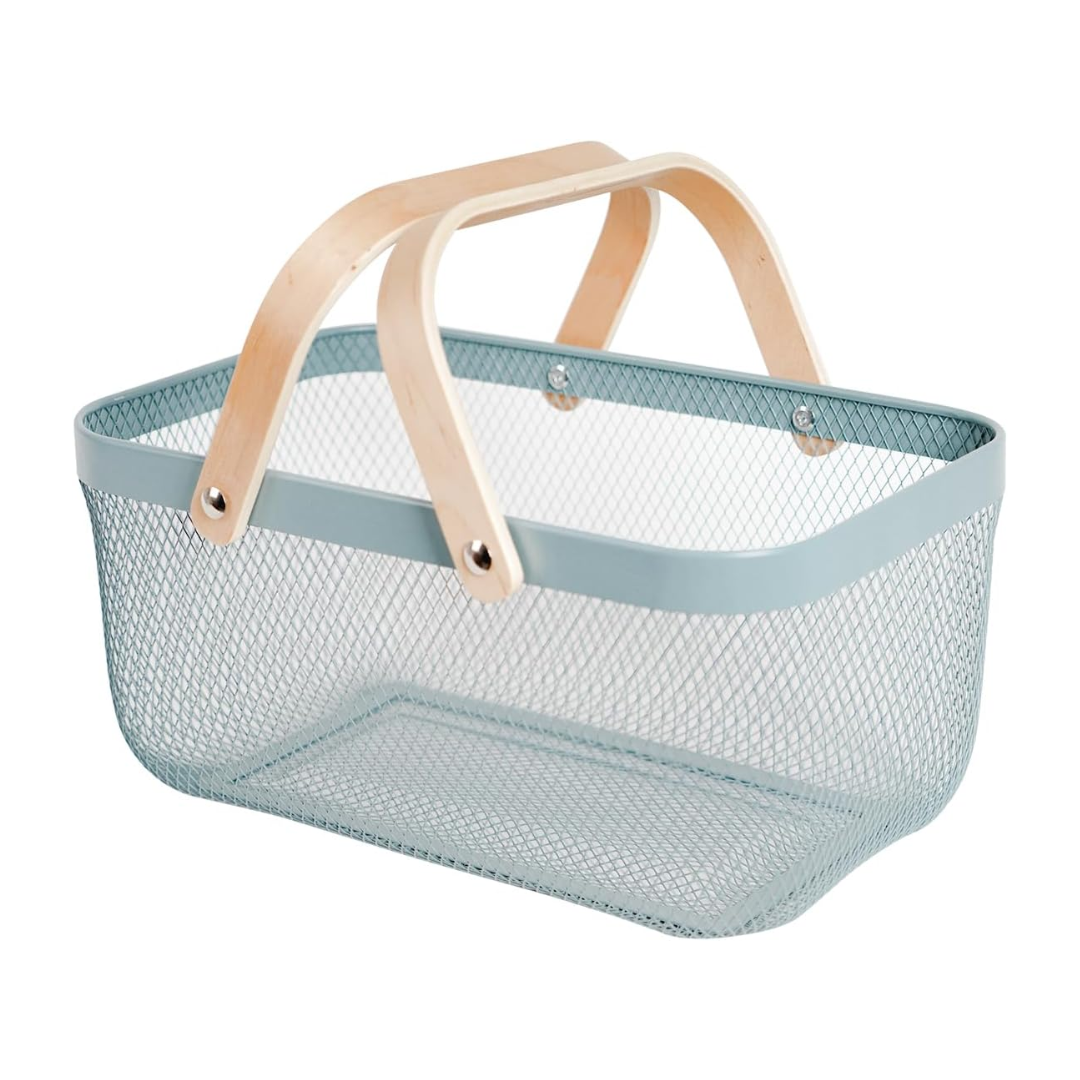
Metal Mesh Steel Harvest Basket (14.5 x 9.5 x 7 Inches)
This steel mesh basket is durable and can be used to harvest herbs, fruits, and most vegetables. This harvest basket can also be used as a colander to rinse of vegetables immediately after harvesting.

Fiskars Garden Harvest Basket with Tool Caddy - Extra Large (14 x 15.25 x 5.38 Inches)
This extra large sized harvest basket is strong and ample enough to carry even my largest produce. With fold down handles and a built-in colander, this basket is perfect for all sized produce.

Foldable Garden Seat with Wide Kneeling Pad & Tool Pouch (21" x 11" x 19" Inches)
This sturdy convertible garden bench seat supports more weight and has an extendable leg base that prevents the seat from tipping. Can support up to 420 pounds of weight, is foldable & easy to store. c
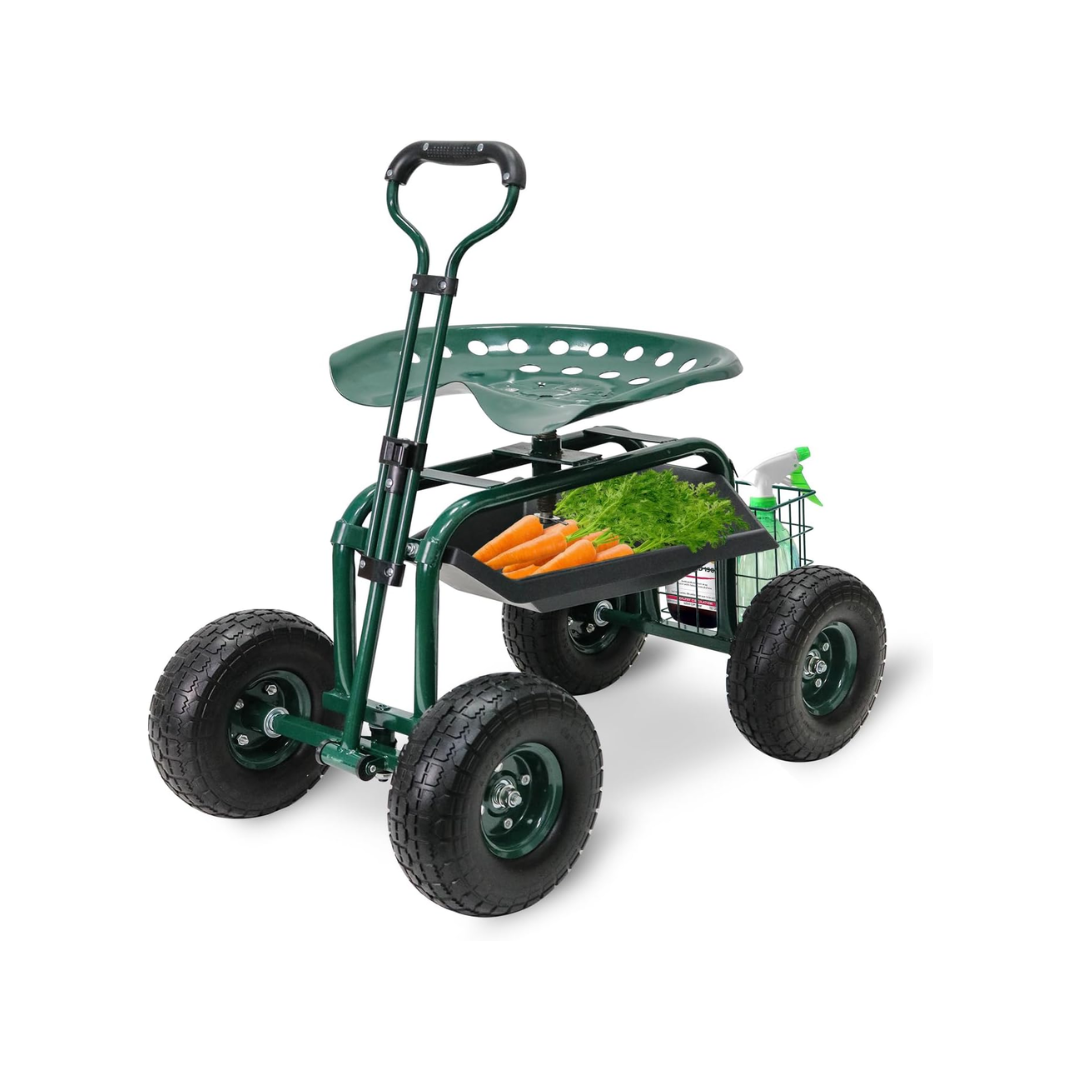
Rolling Garden Cart with Swivel Seat, Steering Handle & Utility Tool (31.5 × 18.1 × 33.8 Inches)
This rolling garden cart has durable rubber tires, a 360° rotating swivel seat with adjustable seat height, an extendable steering handle, wire storage basket, and under-seat plastic tray for tools.
PROTECTIVE GARDEN GEAR & ACCESSORIES
What kind of garden shoes do you recommend? There are many options available, but I always have two things in mind before buying any garden gear. Is it made well so it will last? And, is it an economical choice? I think protective shoes, gloves, sunglasses, and a hat are an absolute must for gardening. You can easily ruin a pair of regular street shoes with a pick, rake, mud, or even water, so having a pair of protective garden shoes will keep you dry and safe from a foot injury. My favorite garden gloves are listed in the Planting Tools section above. Just about everyone owns a pair of sunglasses, but not necessarily a gardening hat. The options below are my favorite products in these categories.
Waterproof Slip-On Rubber Garden Shoes for Women: Instead of getting dirt, water, and/or mud all over your regular shoes, it’s worth investing in a pair of garden shoes. These lightweight rubber garden clogs are protective enough for light gardening, watering, and harvesting your produce.
Women's Waterproof Rubber Mid Calf Garden Boots: These are my favorite pair of garden boots. With a sturdy sole and thick rubber structure, they protect my feet and ankles whether I’m tilling the soil, digging and transplanting with a shovel, or simply watering my garden. In my opinion, the mid-calf design is the best for gardening. Available in a variety of colors and sizes ranging from women’s 6 - 10.5.
Men's Steel-Toe Waterproof Slip Resistant Rubber Garden Boots: With a protective steel-toe, these garden boots will protect you when doing heavy duty yard work and gardening. Available in a variety of colors and sizes, including regular and wide width sizes from men’s 6 - 13 wide.
Waterproof Slip-On Garden Shoes for Men: These slip-on garden clogs by Sloggers are well made, long lasting, waterproof, and have a comfortable insole. Available in a few colors and sizes ranging from men’s 9 - 12.
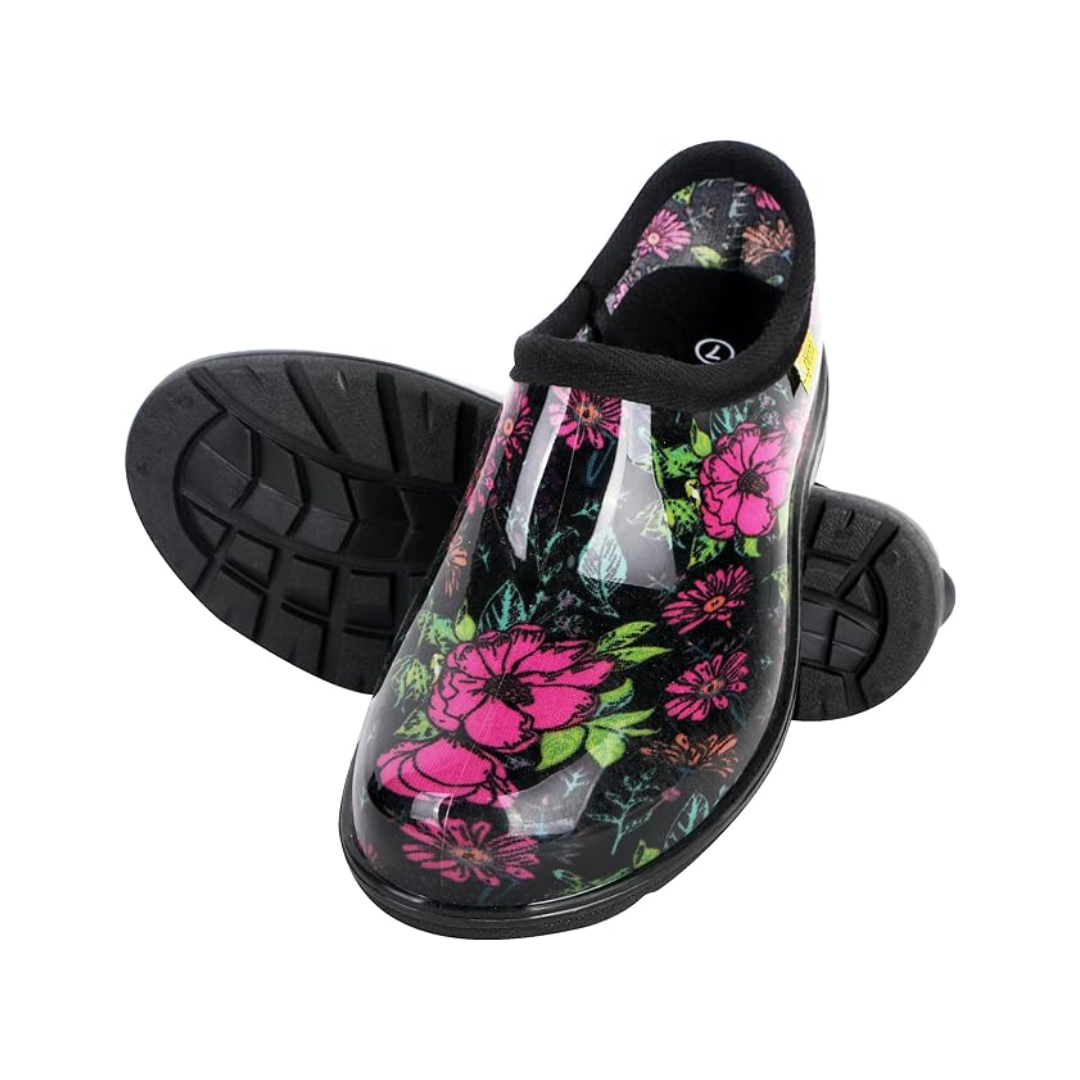
Waterproof Slip-On Rubber Garden Shoes for Women (Sizes 6 - 10)
A durable pair of women’s lightweight outdoor rubber garden clogs with a comfortable insole. Perfect for light gardening or harvesting. Available in a variety of sizes.
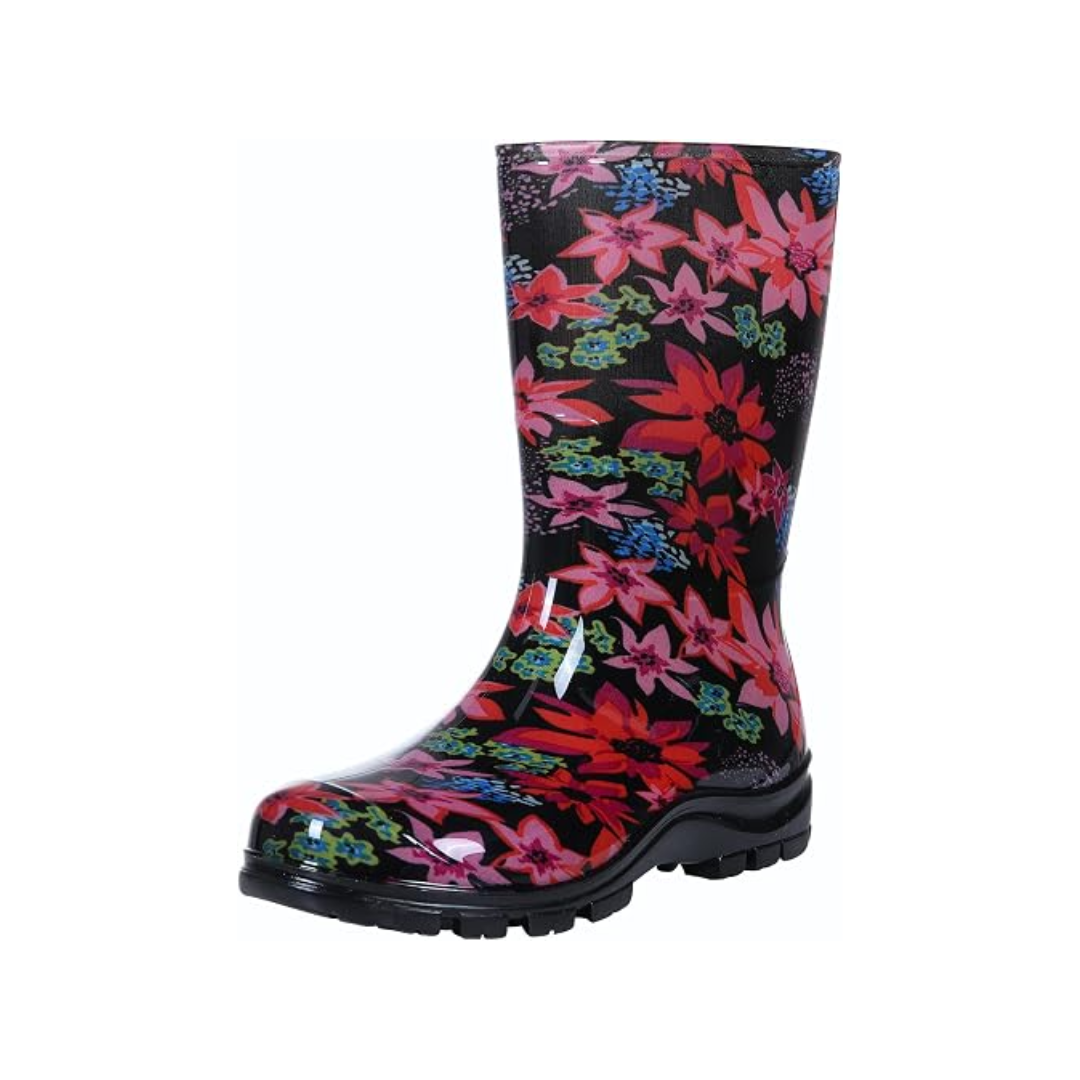
Women's Waterproof Rubber Mid Calf Garden Boots (Sizes 6 - 10.5)
The perfect pair of garden boots with a heavy duty sole for shoveling or muddy days in the garden. Will last for many gardening seasons.
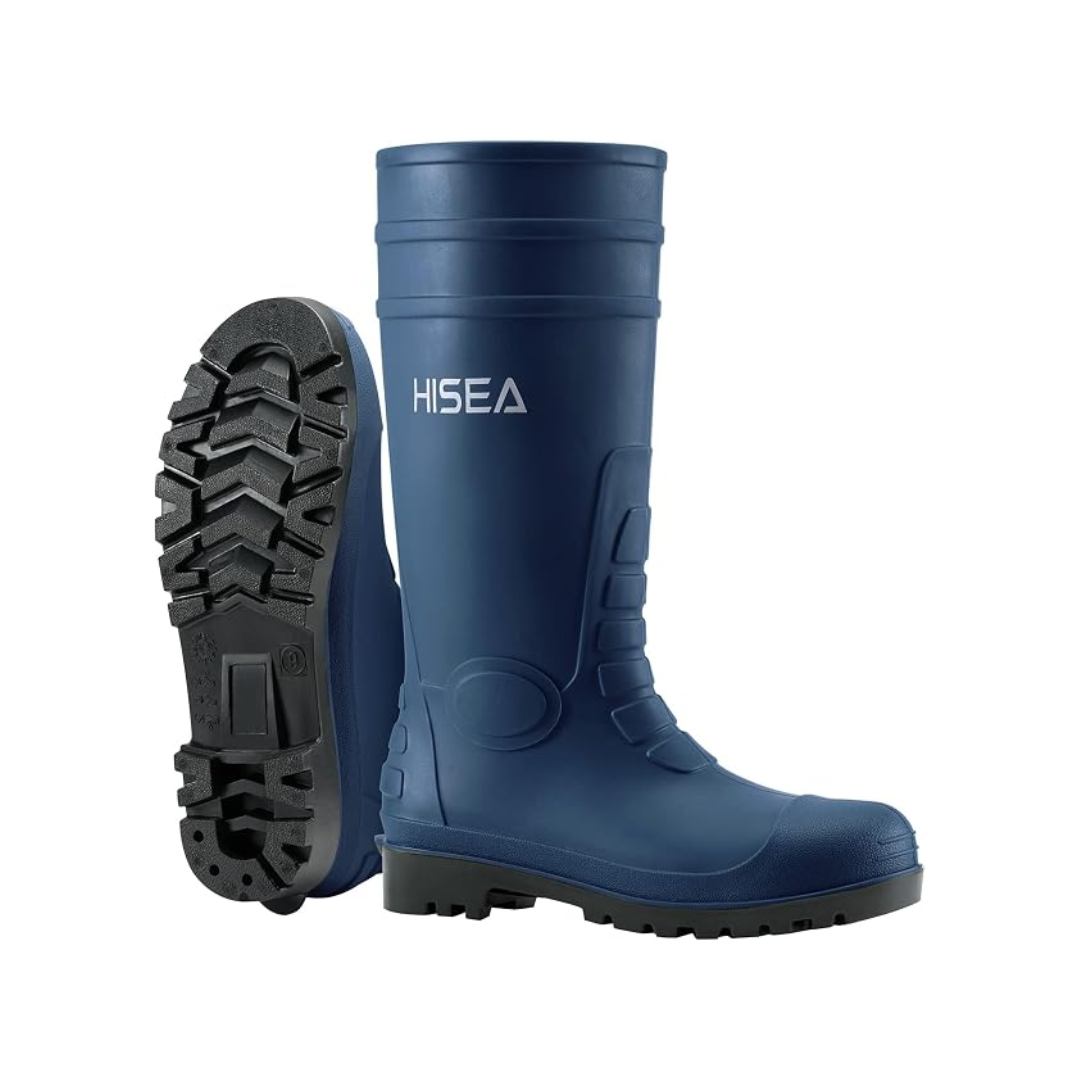
Men's Steel-Toe Waterproof Slip Resistant Rubber Garden Boots (Sizes 6 - 13 Wide)
These heavy duty garden boots have a protective steel-toe for heavy duty yard work and gardening. Available in a variety of colors and sizes (regular and wide width).
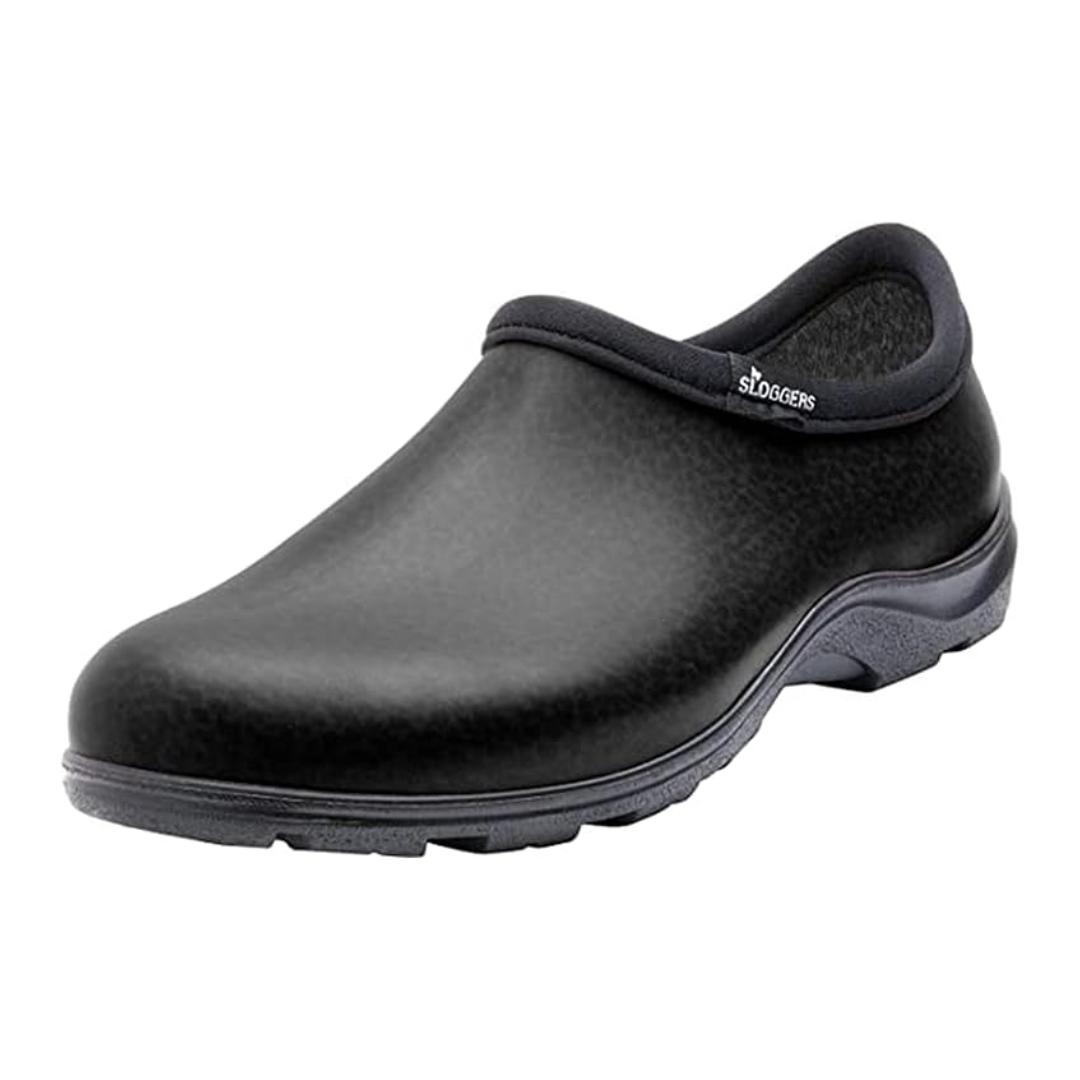
Sloggers Waterproof Slip-On Garden Shoe for Men (Sizes 9 -12)
These slip-on garden clogs by Sloggers are well made, comfortable, and waterproof, to protect you in the garden.. Available in a few colors and sizes (9 - 12).
Can you recommend any lightweight garden hats with a wide brim? Yes! I’ve always worn large straw hats to garden, but found them bulky to store and had to throw them away after they got dirty (usually after tilling my soil). These fabric garden hats are a game changer, as they are lightweight, easy to store, washable, and last much longer than straw hats.
Waterproof Wide Brim Sun Bucket Hat for Men & Women - UPF 50+: This garden hat features an elastic rear drawstring and adjustable chin strap to ensure a comfortable fit for head circumferences of 22-24 inches, making it ideal for both men and women. The chin strap keeps the hat securely in place, even in windy conditions. Equipped with a wide 3.9-inch brim, this hat offers full coverage to shield your face and neck from harmful UV rays. It’s hand washable and foldable, which makes it easy to store. More than just a garden hat, its foldable design makes it the perfect travel hat for those hiking trips. Available in a variety of colors.
Sun & Garden Hat with Extra Wide Brim & Neck Flap for Women & Men - UPF50+: Featuring a 4.7" wide shade and extended neck flap to block harmful UVA/UVB rays, this hat is lightweight, made of a waterproof nylon, and has an easy space-saving and packable design (can be rolled). It has a durable chin string and a locking toggle to keep it secure in windier conditions. It’s most unique feature is a cleverly hidden hole in the back of the hat to easily pull a messy bun or ponytail through, which keeps your neck cool. One size fits most adult men and women with a head circumferences of 21 to 23 inches. Available in a variety of colors.
Waterproof Extra Wide Brim Sun & Garden Hat for Men & Women - UPF50+: This sun & garden hat has a super wide brim width of 6.3 inches to protect you from the sun. It has a rear adjustable elastic drawstring design with breathable material, and is water repellent and hand washable. Perfect for those wanting more sun protection in the garden. It can be folded for easy storage or for traveling. One size fits most adult men and women with head circumferences of 22.6 - 23.2 inches. Available in a variety of colors.
Double Weaved Hard Shell Straw Hat Super Wide Brim: For those who prefer a traditional straw hat with more sun protection, this straw garden hat has a curved 7.5 inch brim and an adjustable chin strap. The sizing runs small to medium and is best suited for head sizes between 20.5 and 21.5 inches.

Waterproof Wide Brim Sun Bucket Hat for Men & Women - UPF 50+
Equipped with a wide 3.9-inch brim for sun protection, this garden hat is hand washable, foldable, & fits head circumferences of 22-24 inches. Also makes a great travel hat! Available in a variety of colors.

Sun & Garden Hat with Extra Wide Brim & Neck Flap for Women & Men - UPF50+
This unisex hat has a 4.7" wide brim, extended neck flap, hidden ponytail hole, adjustable chin strap with a packable design. Fits head circumferences of 21 to 23 inches. Available in a variety of colors.
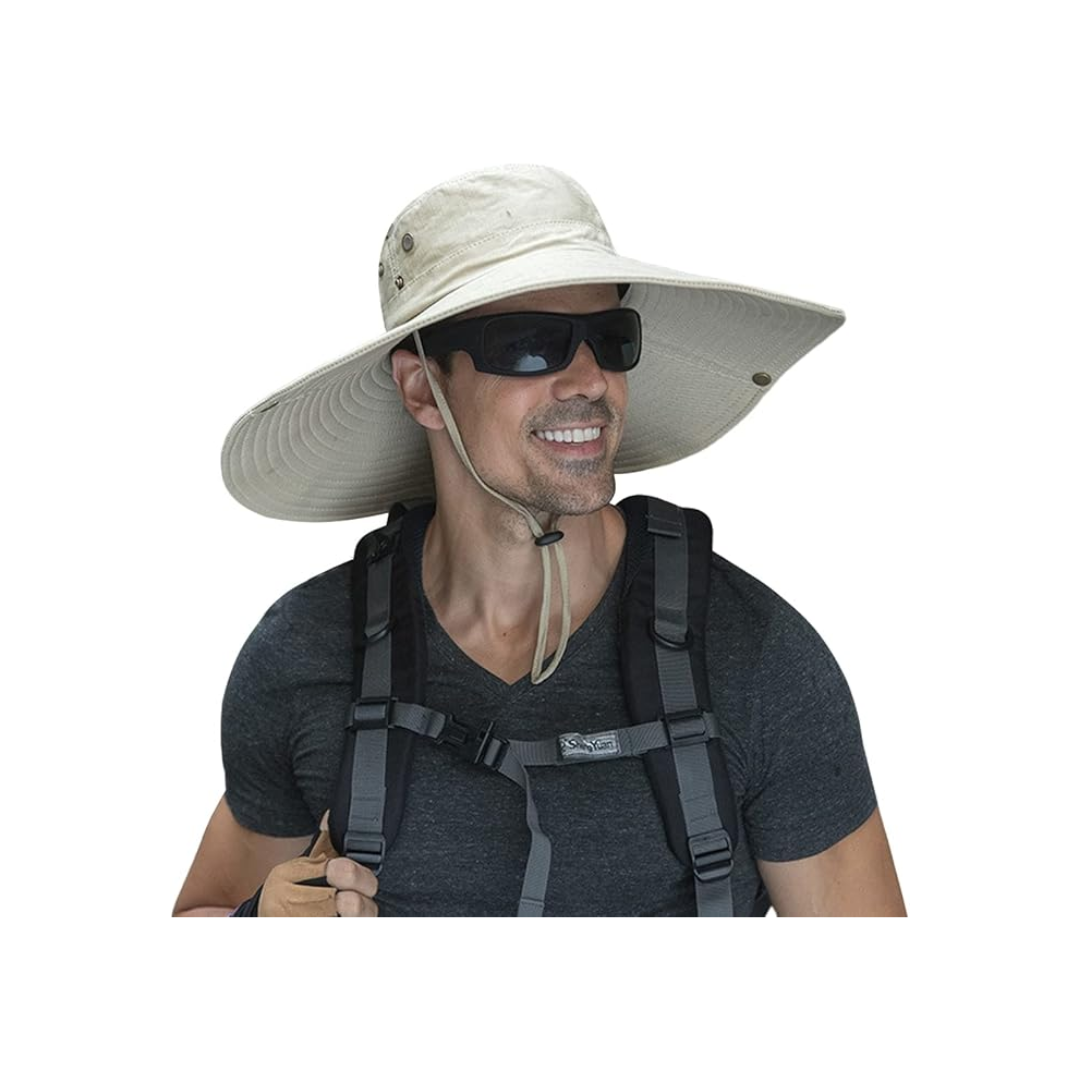
Waterproof Extra Wide Brim Sun & Garden Hat for Men & Women - UPF50+
This hat is perfect for gardening and traveling, with its adjustable elastic drawstring design, breathable material, and super wide 6.3 inch brim to protect you from the sun. Available in a variety of colors.
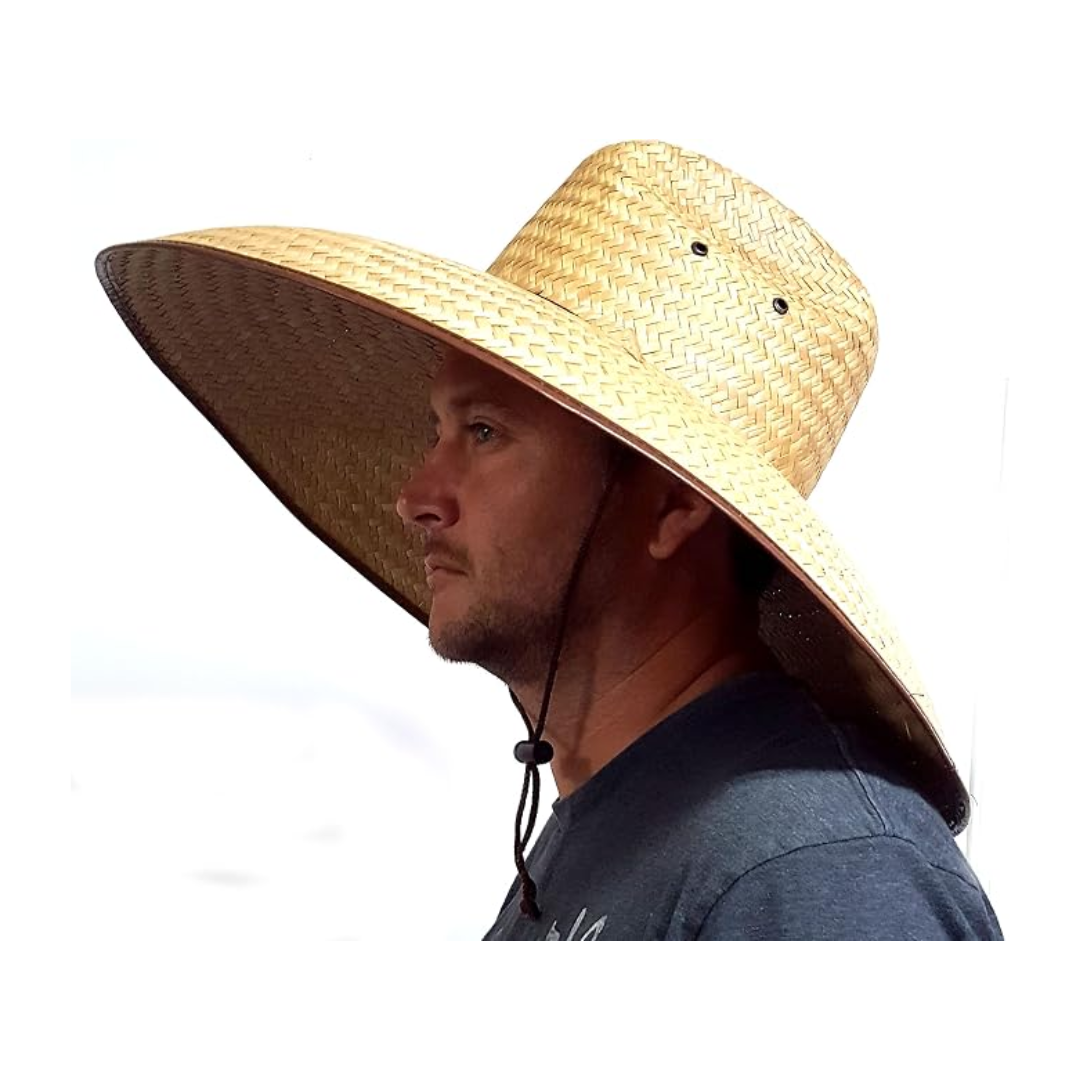
Double Weaved Hard Shell Straw Hat Super Wide Brim
This traditional straw garden hat has more sun protection with a curved 7.5 inch brim and an adjustable chin strap. Runs small to medium and is best suited for head sizes between 20.5 and 21.5 inches.
Every editorial product is independently selected. I may be compensated or receive an affiliate commission if you purchase products via these links. As an Amazon Associate, I earn from qualifying purchases.
MY GARDEN PHOTOS & UPDATES
Based on my climate in Southern California, all the vegetable, herb, and flower seeds were directly sown into my organic garden soil. I wouldn’t recommend directly sowing seeds into your garden unless you have the optimum climate conditions, and the directions on the seed packets indicate it’s okay to do so. A much better option to achieve a stronger start for your plants is to start them indoors, and plant them in your garden beds as seedlings.
I am certainly not an expert gardener, but I have had some solid success in my home garden over the years. The photos and videos below are some examples of my vegetable and herb gardens during both good and bad growing seasons. I’ll post more photos and videos of my gardening progress at the end of each of my growing seasons.
Evolution of My Spring/Summer Garden - 2026
2026 was a tough year for my garden. Although I sowed my seeds at the beginning of April (which was earlier than in 2025), I encountered plenty of challenges due to weather and unwanted critters. On the positive side, I was lucky that the garden pests were not an issue this year. However, a few larger critters tested my patience and destroyed my garden. During the first 6 weeks after sowing all my seeds, some plants germinated but most were uprooted by raccoons who were digging for grubs in my richly amended soil. Almost every seed I planted and most of the seedlings were destroyed. There were deep holes throughout all my garden beds and most of the soil had been completely turned over. I ended up sowing seeds three separate times during those first 6 weeks.
After researching humane pest control methods, I finally found a way to deter the raccoons (my natural pest control methods are above). A few months later, the squirrels got to my blushing tomatoes before I could protect them with mesh bags (other methods for controlling pests). Between the pesky critters and intense heat (over 5 straight months of oppressive heat between high 80s and low 100s) with only 2 days of rain during that period, the harsh conditions caused plenty of scorched leaves and vegetables this year. Despite all the challenges this year, I had a decent yet smaller harvest this summer.
All vegetable and herb seeds were directly sown into organic soil.
Evolution of My Spring/Summer Garden - 2025
Despite my late planting during the first week of May 2025, my garden became a small jungle thanks to plenty of rain during spring along with months of summer sun. My harvest was plentiful from the endless zinnias, gargantuan zucchini that produced and overabundance of squash for 4 months straight, varied lettuce, flavorful carrots, various herbs, to tons of beautiful heirloom tomatoes, and many more vegetables. Overall, it was a great year for my garden.
All vegetable and herb seeds were directly sown into organic soil.